Sometimes to save time on my larger studio paintings, I use a grid as I draw out the scene on my canvas. For me, a grid is most useful on large paintings that include people. The high degree of accuracy they require would normally mean I would spend more time measuring, but a grid saves me time on that step.
I don’t usually bother with a grid for landscapes or smaller pieces. And I try to work from life as often as possible to practice recognizing shapes accurately. A grid isn’t a substitute for good drawing skills, it’s just a time saver.
I used Photoshop CS4 to create my grid. (I’m admittedly a little behind on software for my Mac.) Here’s how to do it.
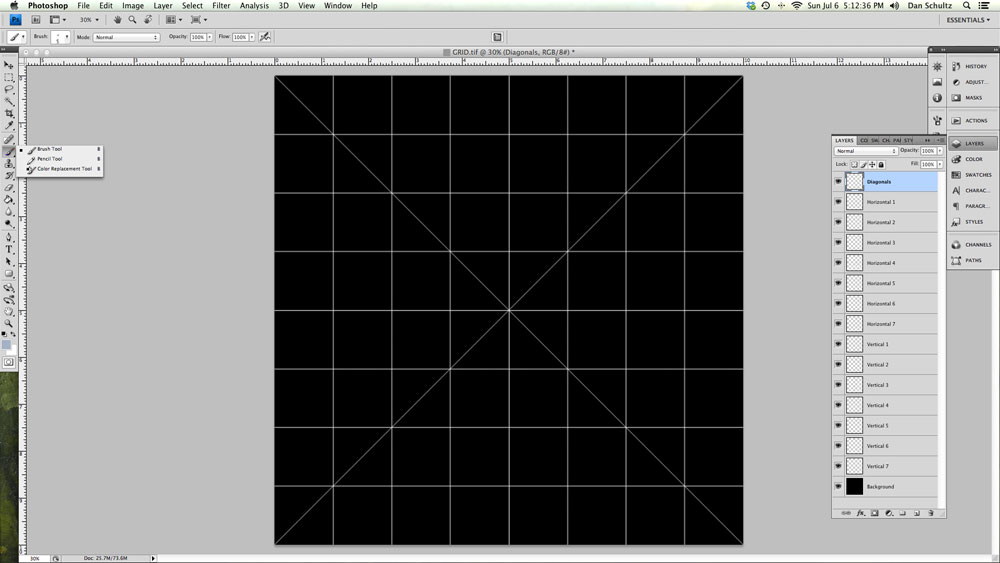
1. Open a new document with a black background that is 10 inches square at 300 pixels/inch.
2. Using the Brush tool set to 5px and 100% hardness, create seven vertical lines, each on its own layer. (I use white lines since they seem to be visible when overlaid on most photos.)
3. Equally space the lines using the ruler.
4. Create the same number of horizontal lines in the same fashion. Now you should have a grid of 64 equal squares.
5. Draw a diagonal line from the upper left corner to the lower right corner and one from the upper right to lower left. (The diagonals offer further measuring help.)
6. Save your grid document as a .PSD or .TIF file (make sure to preserve the layers — don’t flatten) so you can overlay the grid on your source photos.
7. With your grid document still open in Photoshop, also open the photo you want to paint.
8. Click back into your newly-saved grid document, select all of the grid layers (minus the black background) and drag them into the source photo’s window. The grid lines will appear on top of the photo and can be adjusted as a unit to the proportion of the source photo.
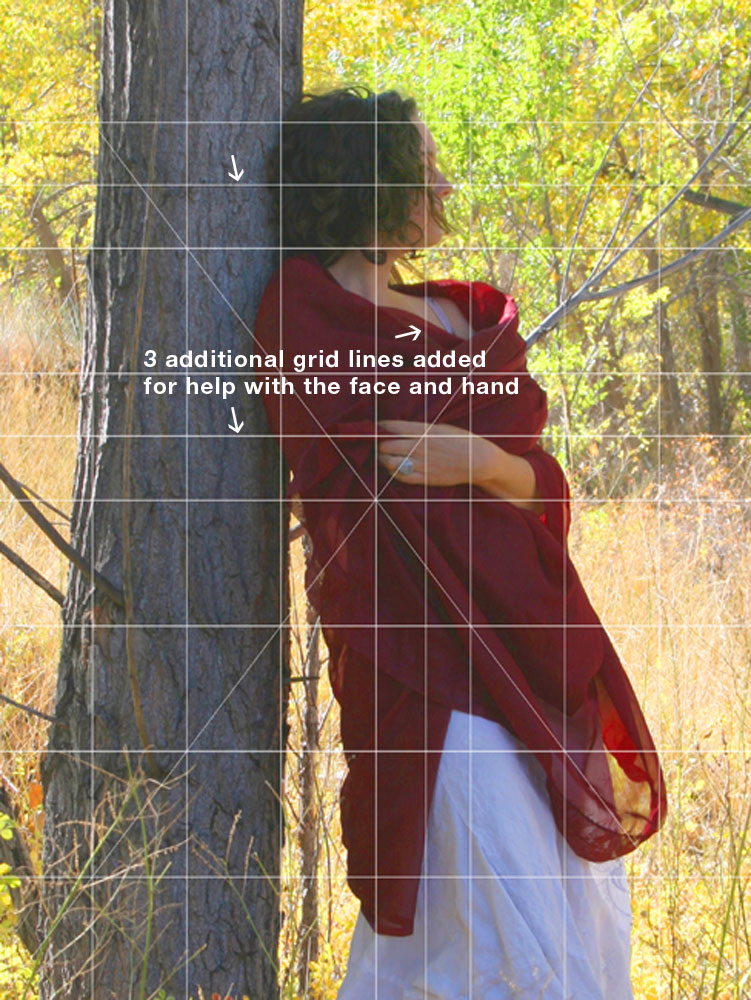
With each grid line on its own layer, you can easily make any line visible or invisible depending on your needs (using the toggle button on each layer). You might even want to copy and paste layers to add extra grid lines in places that require more accuracy in your source photo (subjects’ faces, hands, etc. — see example).
As I’ve mentioned before, I use my iPhone to display my source photo on an LCD monitor as I paint. So I flatten and save my source photo with the grid lines as a new .JPG and transfer it to my iPhone. I also transfer the source photo .JPG that has no grid.
(Of course, you can instead display your source photos on your computer screen while you paint or even print out your source photos.)
Now that your digital grid is done, it’s time to draw a grid on your canvas to match:
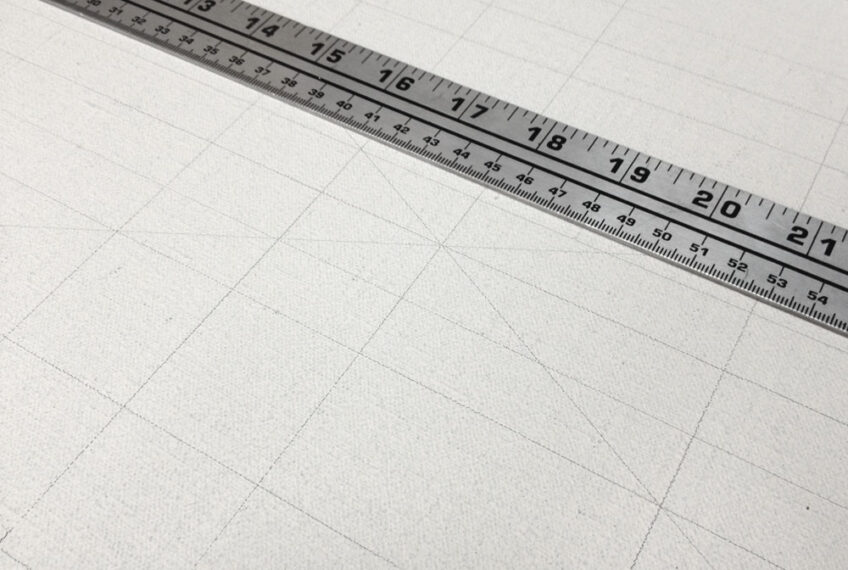
1. Referring to your new source photo’s grid lines, measure and draw grid lines on your canvas to match the grid on your source photo. (I use an HB graphite pencil and a long ruler.) Keep in mind that the proportion of your canvas must match the proportion of your source photo. (For example, a source photo saved at 8 x 10 inches requires a canvas of 8 x 10 inches, 16 x 20 inches, 24 x 30 inches, etc. The proportion must match even if the size doesn’t.)
2. Then use the grid lines on your canvas to help you accurately draw your scene in charcoal or paint. Once you’ve finished drawing, refer to the other copy of your source photo (the one without the grid) as you complete your painting.
Leave a comment below if you’d like to share any other insights on working with a grid.
3 Responses
Joesph
Good post. I learn something new and challenging on websites I stumbleupon every day.
It’s always helpful to read through articles from other
authors and use something from their web sites.
Gilbert
Wonderful. Being a self schooled first time artist i am now richer in knowledge on how to draw more accurate potraits.Thank you for this
Dan Schultz
Glad to be of help, Gilbert.