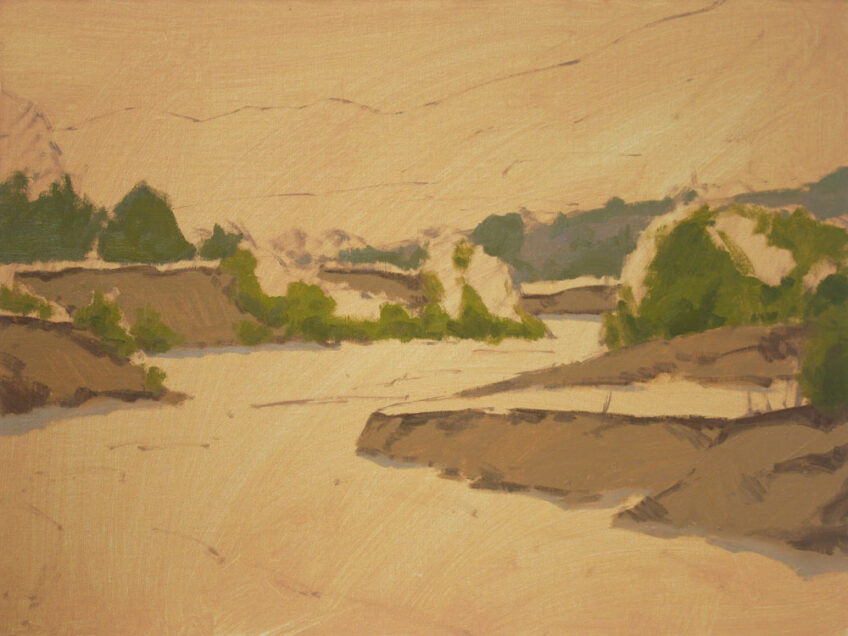
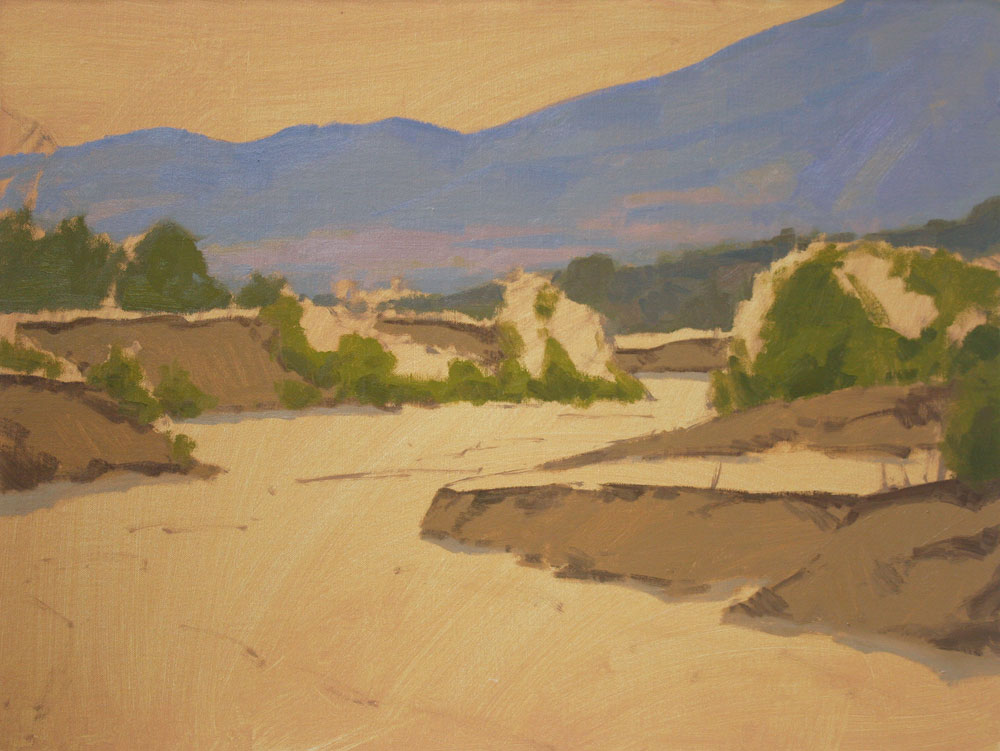
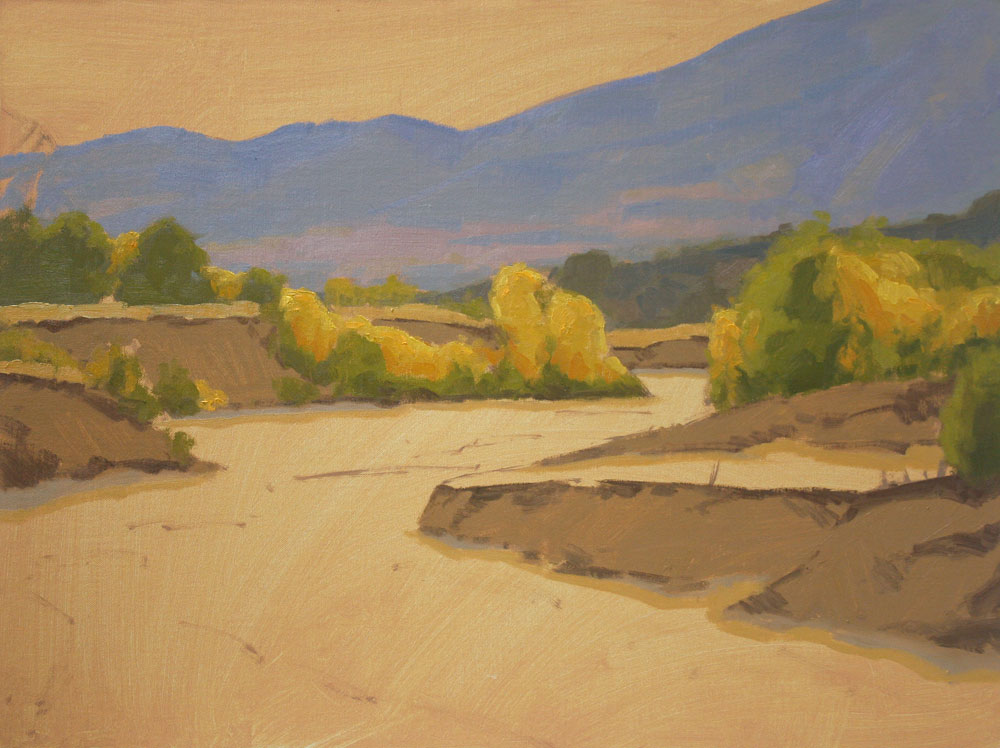
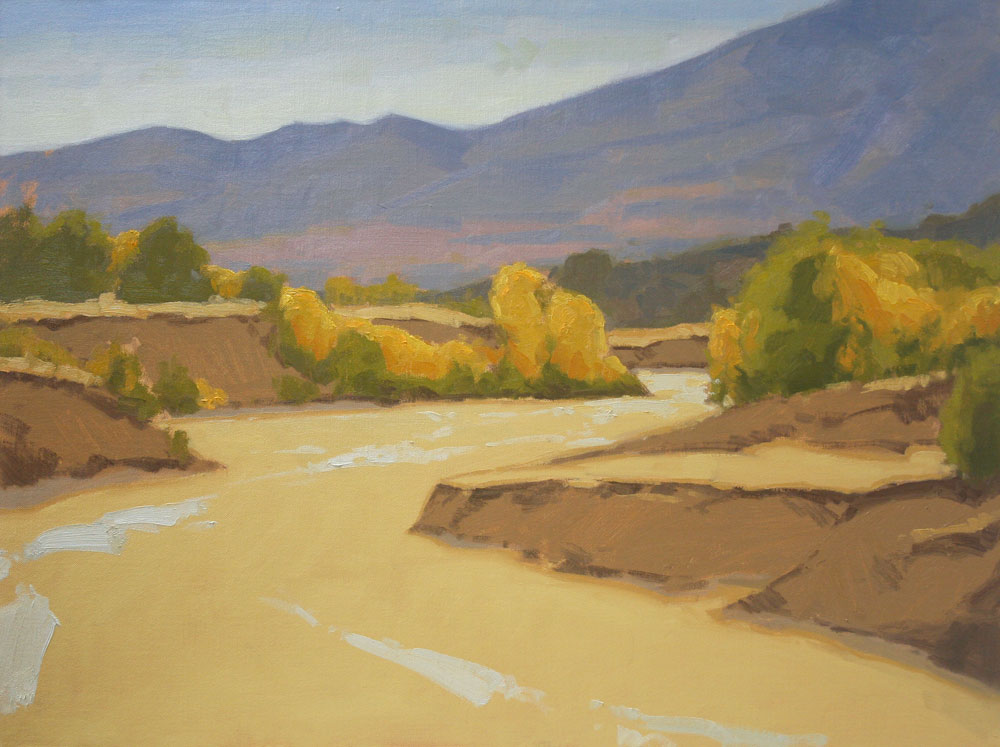
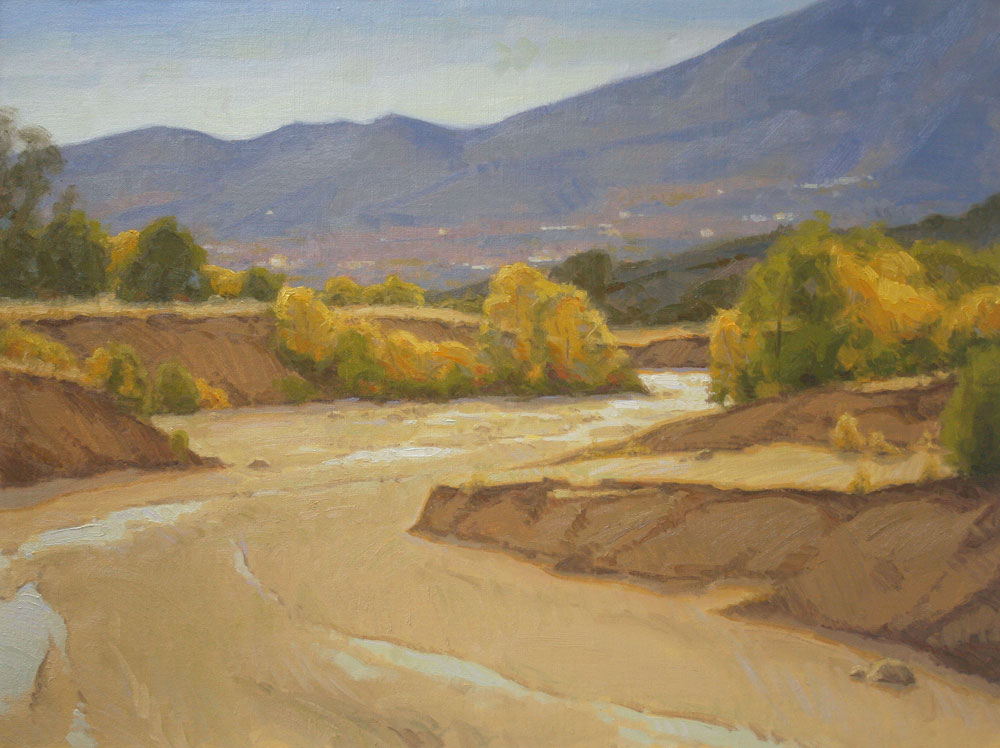
This step-by-step demonstration shows the process I use in my studio when I create a larger studio landscape painting based on a smaller painting that I completed in the field. Below is the 9″ x 12″ plein air painting that I used as my source. Incidentally, continual plein air painting is an invaluable source of information to me as I make decisions while painting in the studio.
Step 1: Prepare to Paint
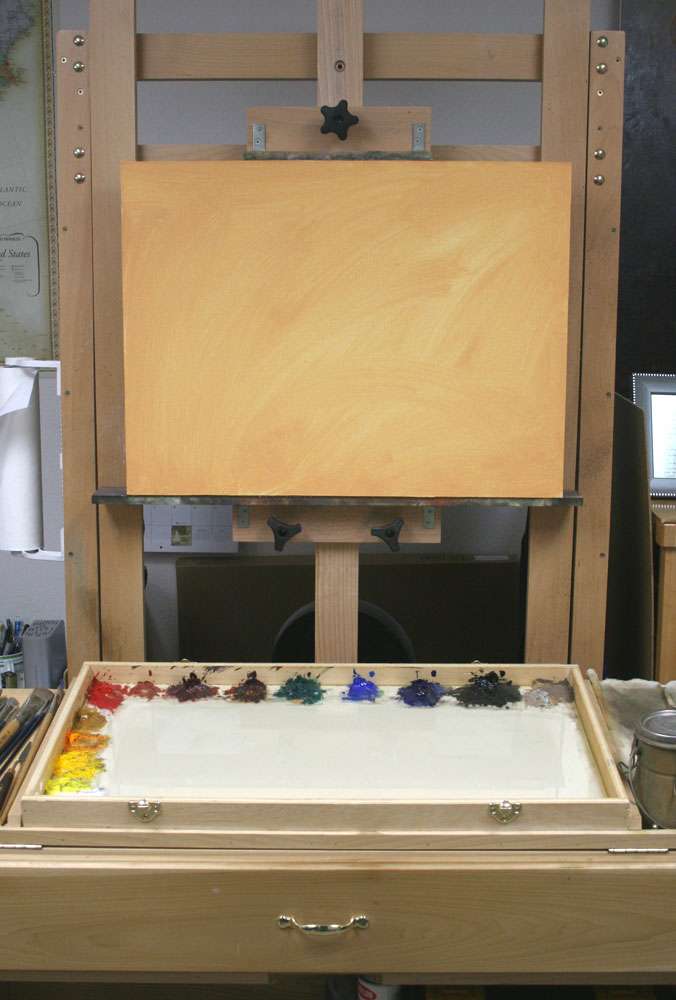
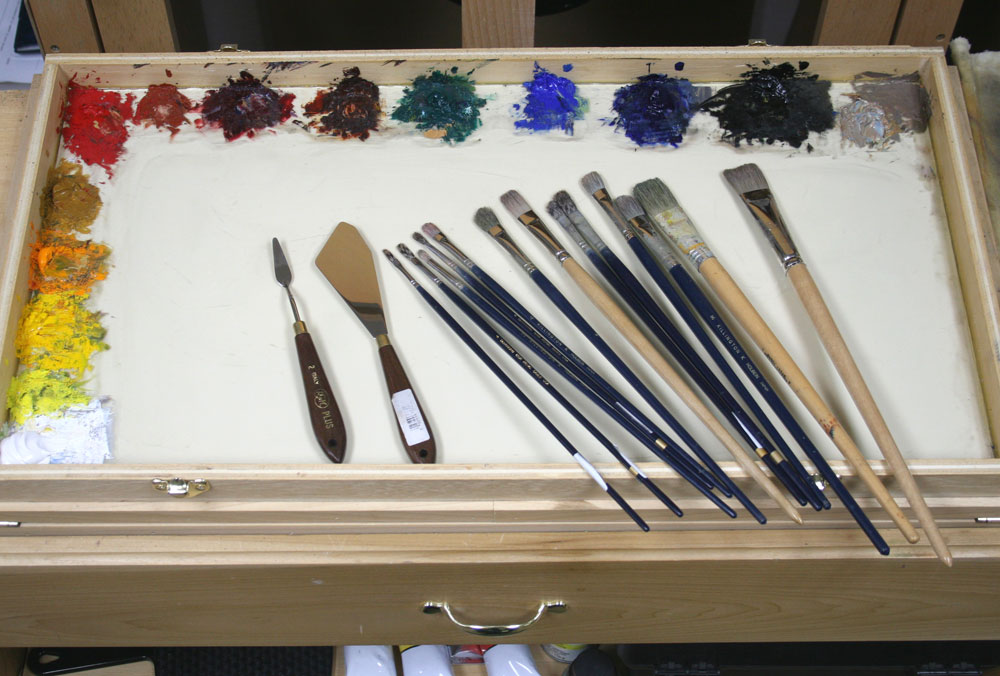
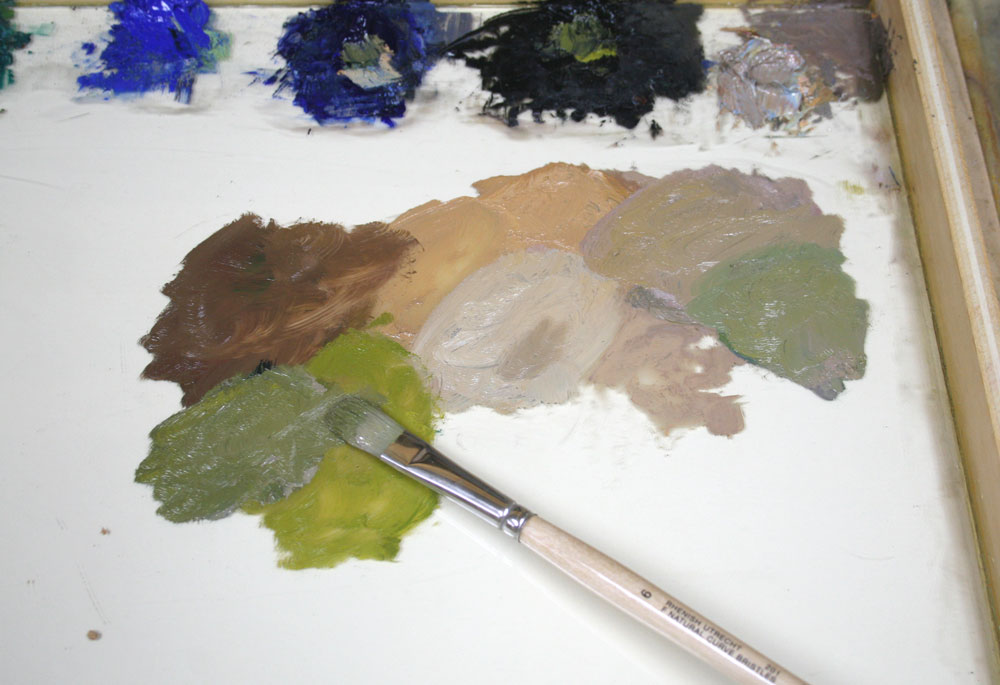
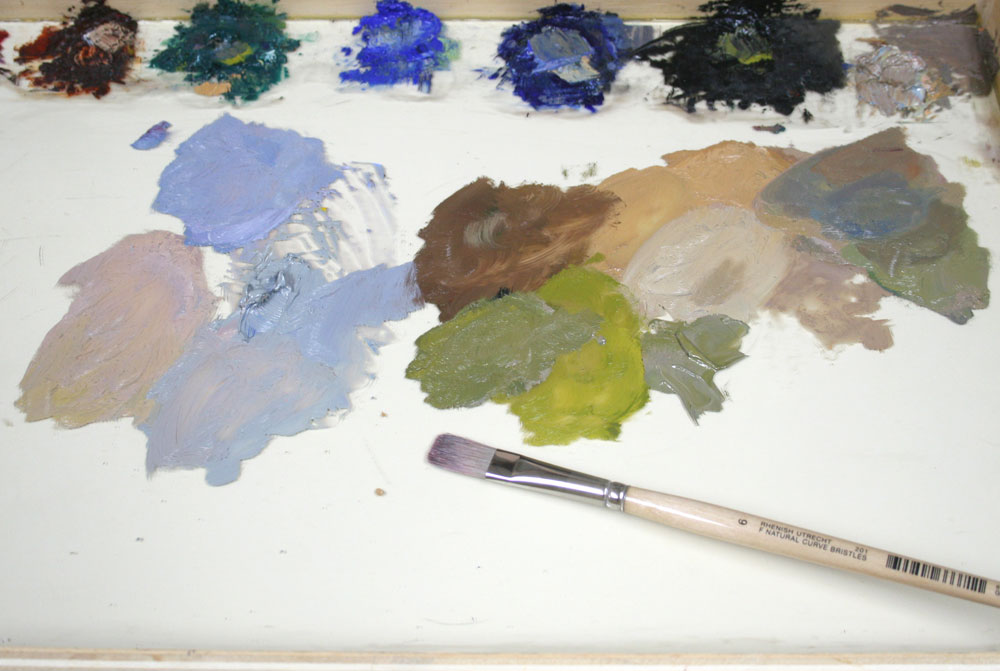
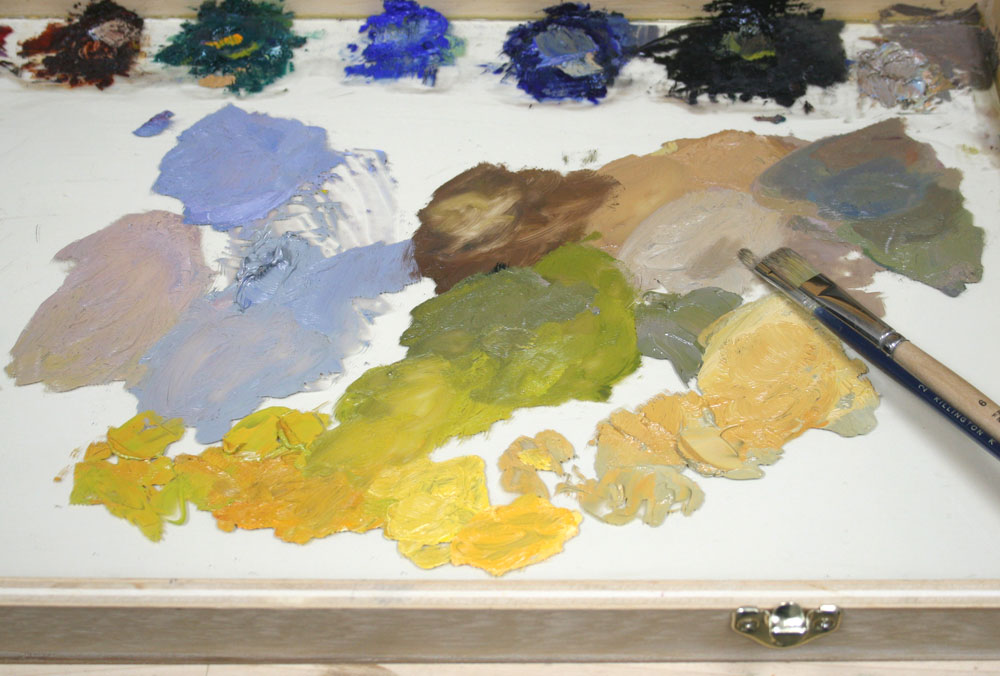
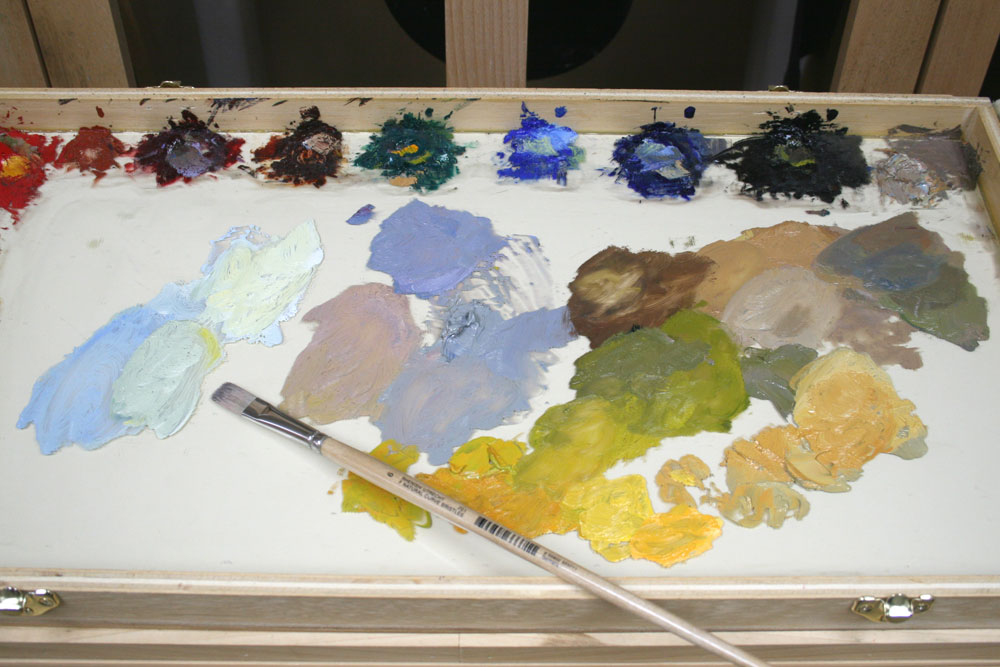
For this 18″ x 24″ studio painting I used Claessens double-oil-primed linen canvas, #15 (my usual painting surface), mounted on 1/2″ Gator Board. I applied an initial wash to the canvas with a color that I hoped would end up being pretty close to my final color for the creek bed in the foreground. I don’t use any medium with my paint, just mineral spirits (Gamsol made by Gamblin) that I sometimes use to thin the paint (which I did for the initial wash, then lightly wiped it with a paper towel). I also laid out all my palette colors (listed below).
Brushes:
Holbein Killington bristle flats and Utrecht bristle flats, sizes 2 – 12
Royal Langnickel sable flats (series 5590), sizes 2 – 12
Assorted palette knives for painting, mixing paint and cleaning my palette
Paint:
(Starting from the lower left of my palette and working upwards and to the right.)
Titanium White (Utrecht)
Cadmium Lemon (Winsor & Newton)
Cadmium Yellow (M. Graham & Co.)
Cadmium Yellow Deep (Utrecht)
Yellow Ochre (Winsor & Newton)
Cadmium Red (M. Graham & Co.)
Venetian Red (Gamblin)
Permanent Alizarin Crimson (Gamblin)
Transparent Oxide Red (Rembrandt)
Viridian (Gamblin)
Cobalt Blue (Winsor & Newton)
Ultramarine Deep (Rembrandt)
Ivory Black (M. Graham & Co.)
The last pile is a gray mixture made from mixing the leftover paint on my palette from my last painting.
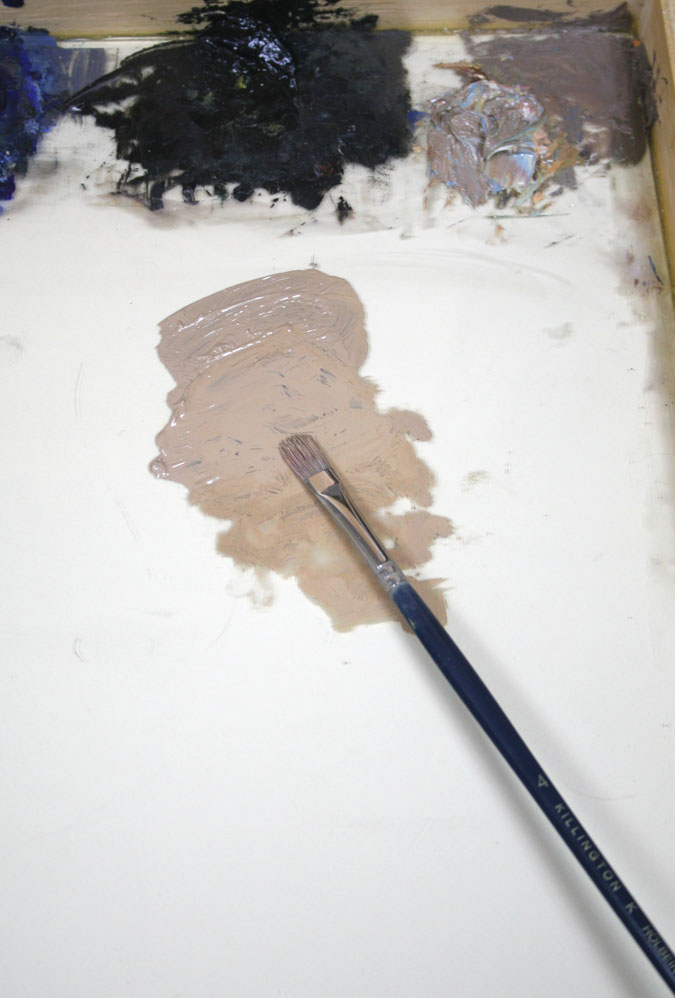
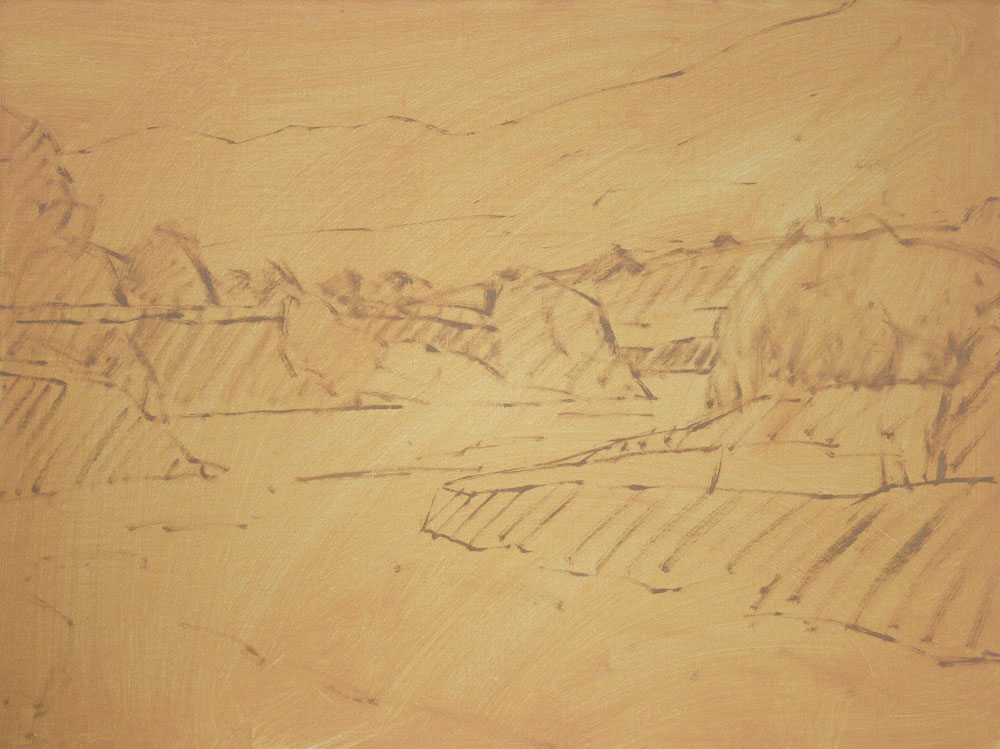
Step 2: Draw the Scene on the Canvas
Using a #4 Holbein Killington bristle flat brush, I used some of the gray mixture on my palette to draw my scene. (It really doesn’t matter much what color is used for the drawing since it will eventually be covered up anyway. I usually just try to use a color that isn’t too intense and that is dark enough in value for me to see it over the initial wash.) I thinned the paint with some mineral spirits so that it would flow off my brush easily and tried to keep the drawing simple and accurate.
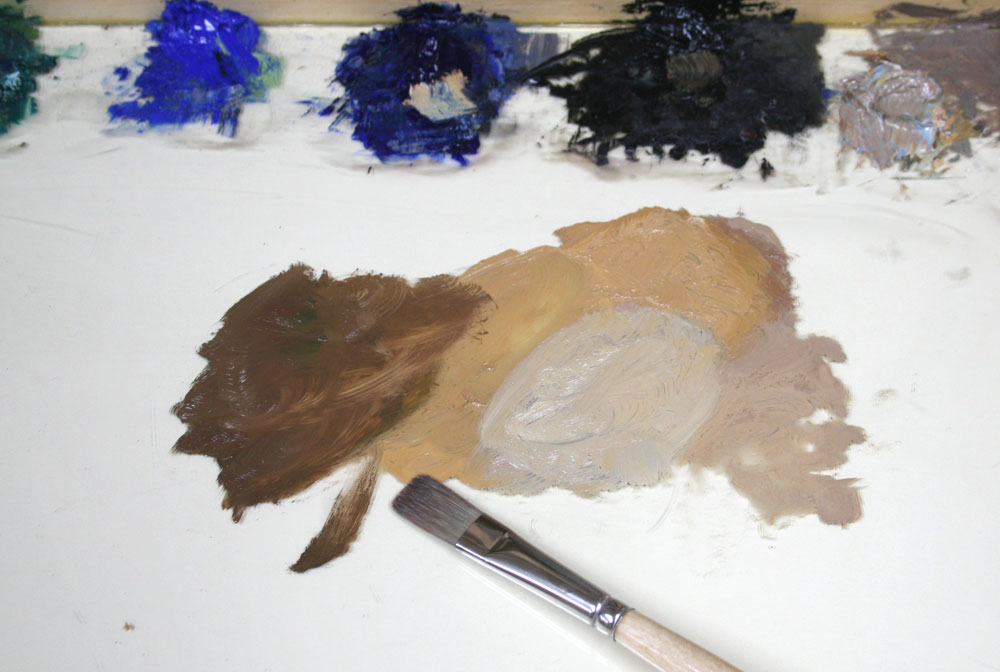
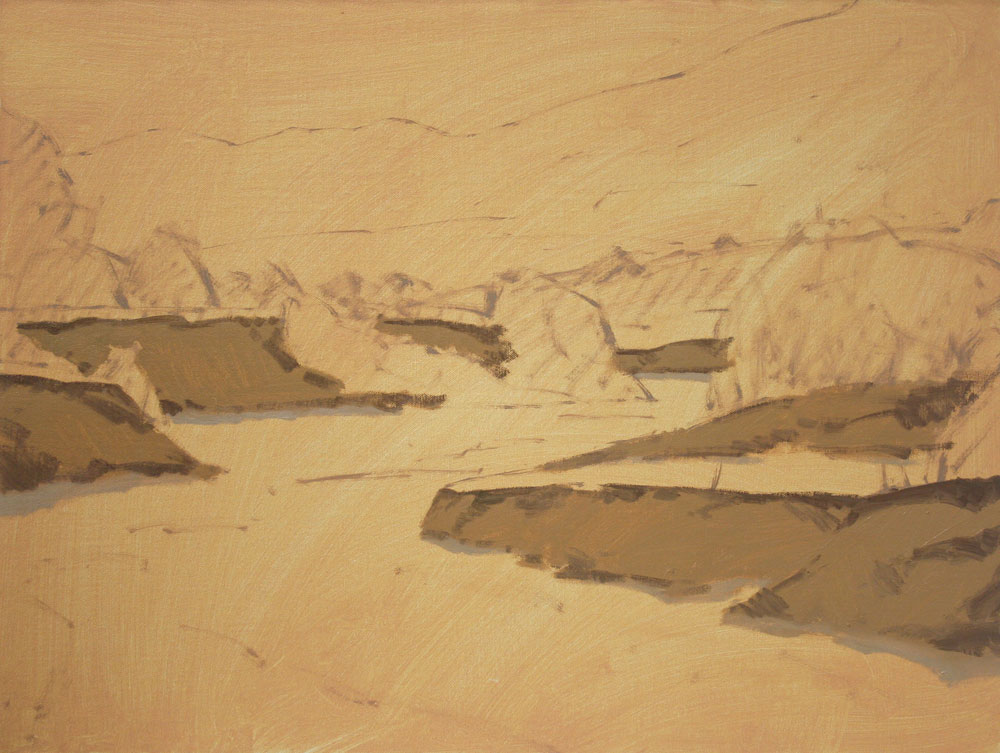
Step 3: Start the Block-In
My next step was to determine the color and value of my darker foreground shadows and to mix it right next to the color I used for the drawing step. I had already decided that I wanted those shadows to be lighter than I had painted them in the plein air painting, so I compared the shadows between the two paintings to make sure I was on the right track. I used a #6 Utrecht bristle flat brush for these block-in steps while being careful to keep my paint consistency just thick enough to cover each area. (I apply thicker paint in certain areas later in the process.)
Step 4: Continue the Block-In
I then continued to the shapes next to the shadows and blocked them in with the approximate values and colors of each shape. (Notice that I continue to mix the colors on my palette right next to (touching) the other colors. This allows me to squint and compare the values right on my palette, then I can double-check value and color accuracy once I block in the shapes on the canvas.) Throughout this process, I did a lot of squinting at my palette mixtures, my source painting and at the larger painting to compare the value relationships between shapes.

Step 5: Continue the Block-In
Next, I continued by blocking in the mountain areas while trying to keep them simple. I wanted to get the majority of the canvas covered with the most accurate values and colors I could before I got into much detail. (It gets easier to accurately compare values and colors as more of the canvas gets covered.) Notice that I continued to work outward from my initial block-in areas to the areas next to them.
Step 6: Continue the Block-In
I began to fill in the lighter tree areas while continuing my efforts to keep the shapes simple. I used a #2 Holbein Killington bristle flat brush in some of those smaller shapes in the trees, and applied the paint a little more thickly.
Step 7: Continue the Block-In
Using the #6 Utrecht bristle flat brush again, I filled in the sky, but didn’t try to complete it yet with clouds, etc. You can see now that my initial wash on the canvas has definitely helped my process. If I had been working up to this point on a white canvas, almost the entire bottom portion of the painting would be glaring white (making it more difficult to compare the values and colors of my other shapes). Thankfully, the initial wash ended up being fairly close to the color I wanted for the creek bed.
Step 8: Continue the Block-In
Next, I blocked in a color for the whole creek bed and started to place the areas of water.
Step 9: Refine the Shapes
After all that block-in work, I finally began to refine some shapes by adding details. Since my focal area is just to the right of center in the painting (the bright trees and the reflecting water in the creek bed), I started refining there first. That way I could compare all the other areas in the painting to that area, letting it predominate with the most details. In this and the following refining steps, I began using #2, #4 and #6 Royal Langnickel sable flats. Their softness allows paint to be easily applied on top of wet paint, even if the paint is thick. They are also very useful for softening edges.
Step 10: Refining
In this step, I revisited my initial shadow areas to bring them to more of a finish. I still tried to keep them simple and somewhat stylized rather than smooth them out. This helps add some excitement to those areas.
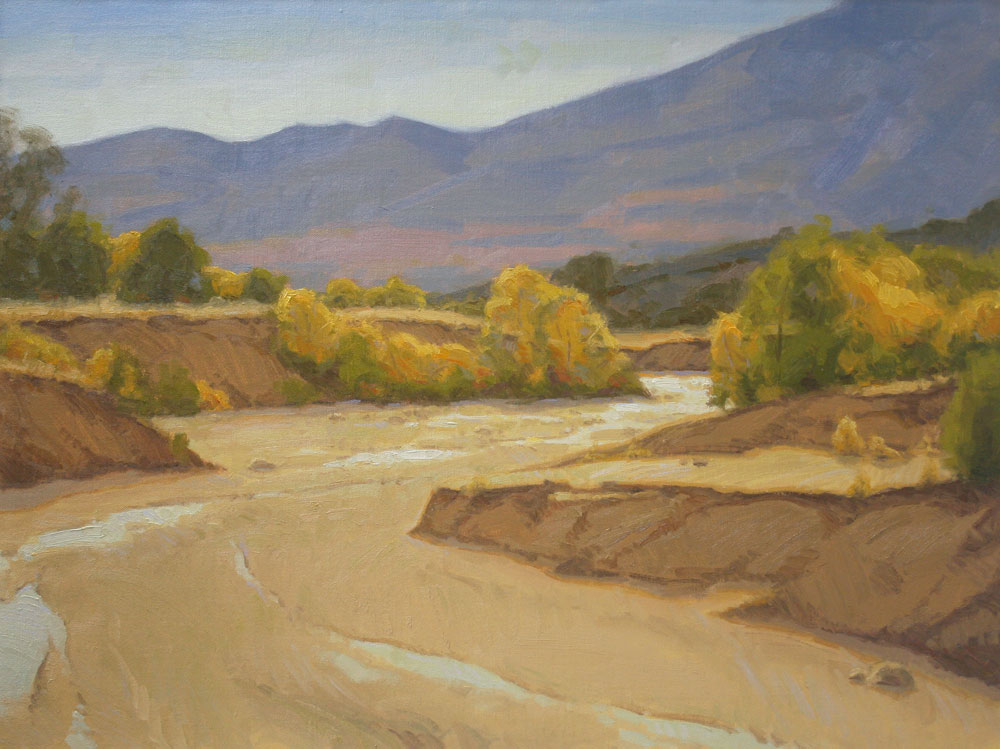
Step 11: Refining
I realized that the color I had chosen for the creek bed was more intense than I wanted, so I repainted that whole area and then added details there.
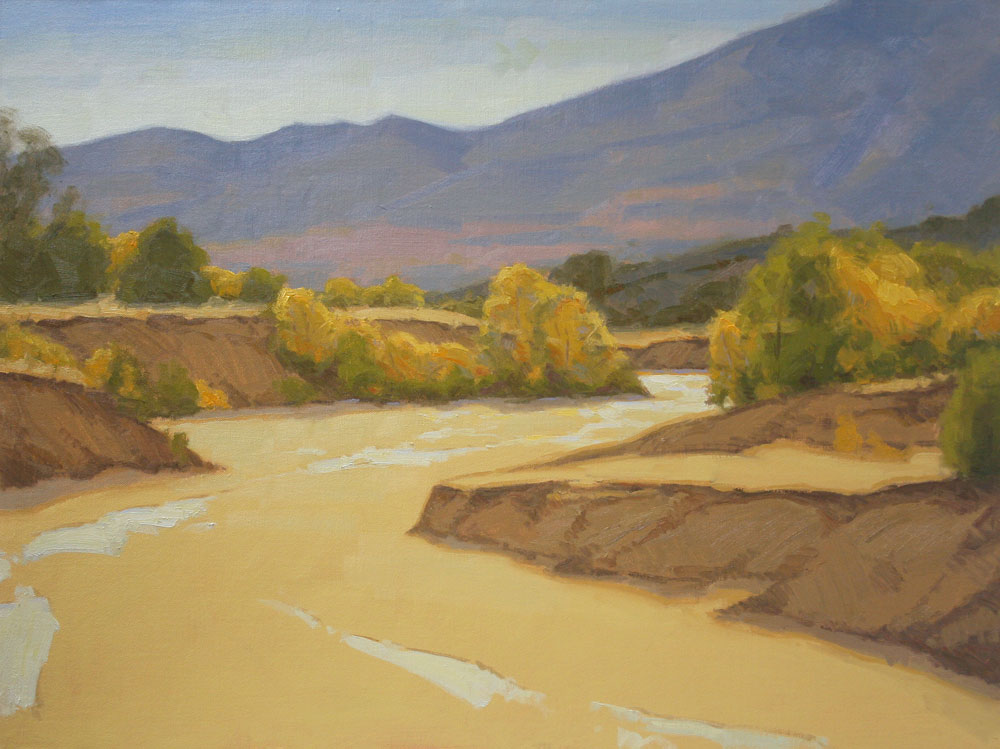
Step 12: Refining
Next, I returned to the mountain areas to add details. Throughout all these refining steps, I continued comparing back to my focal area so that it would still be the most dominant.
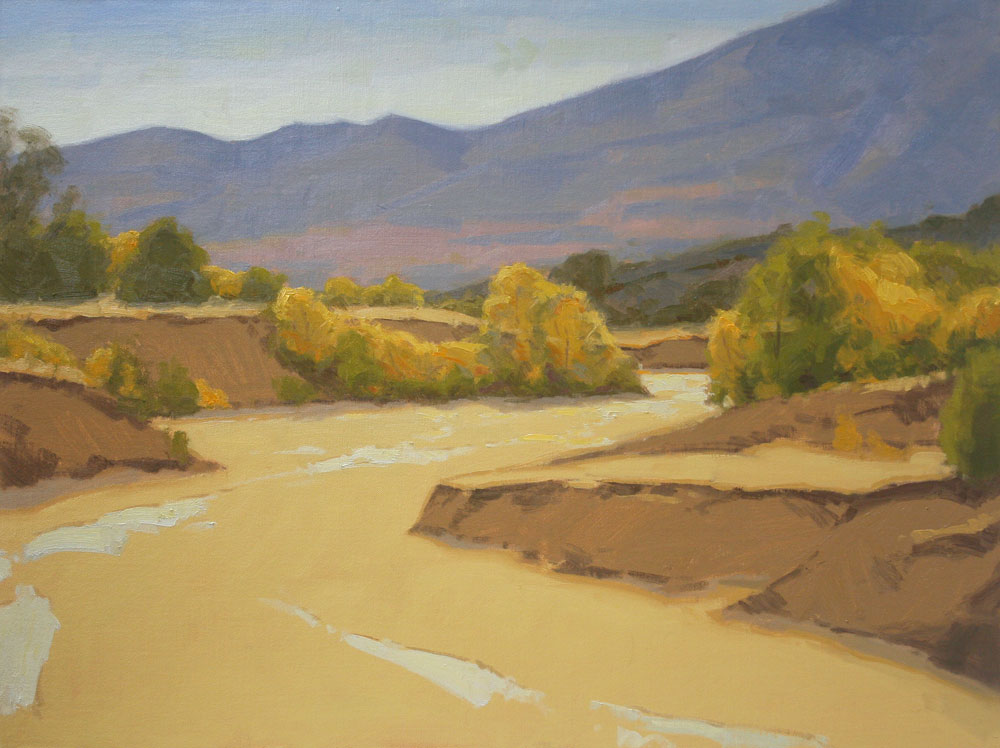
Step 13: Refining
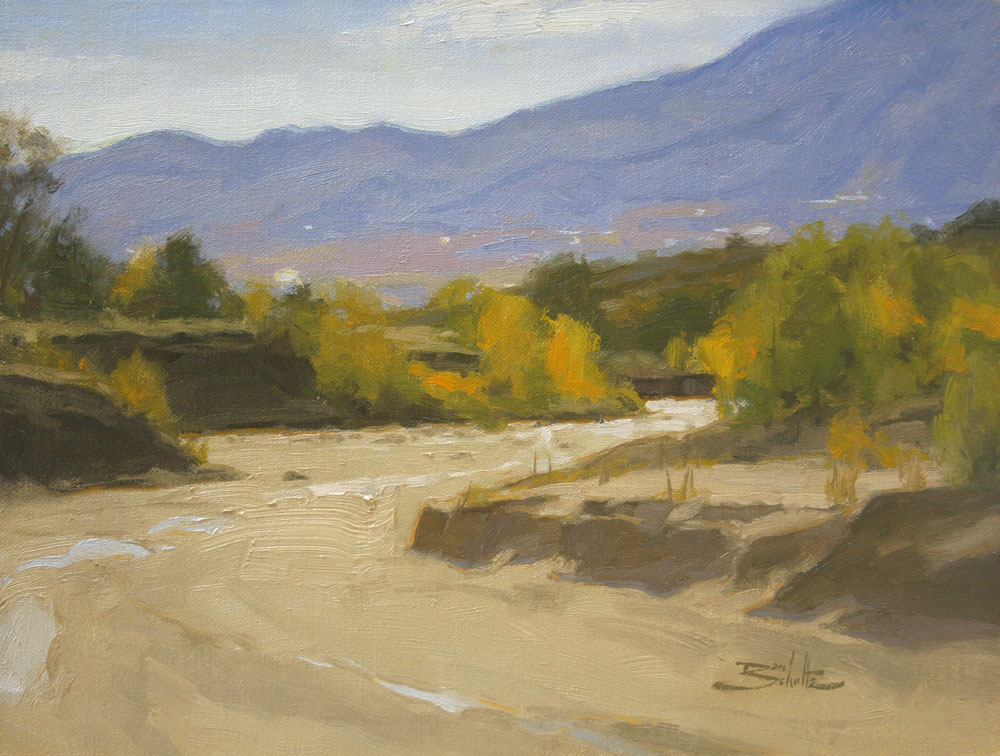
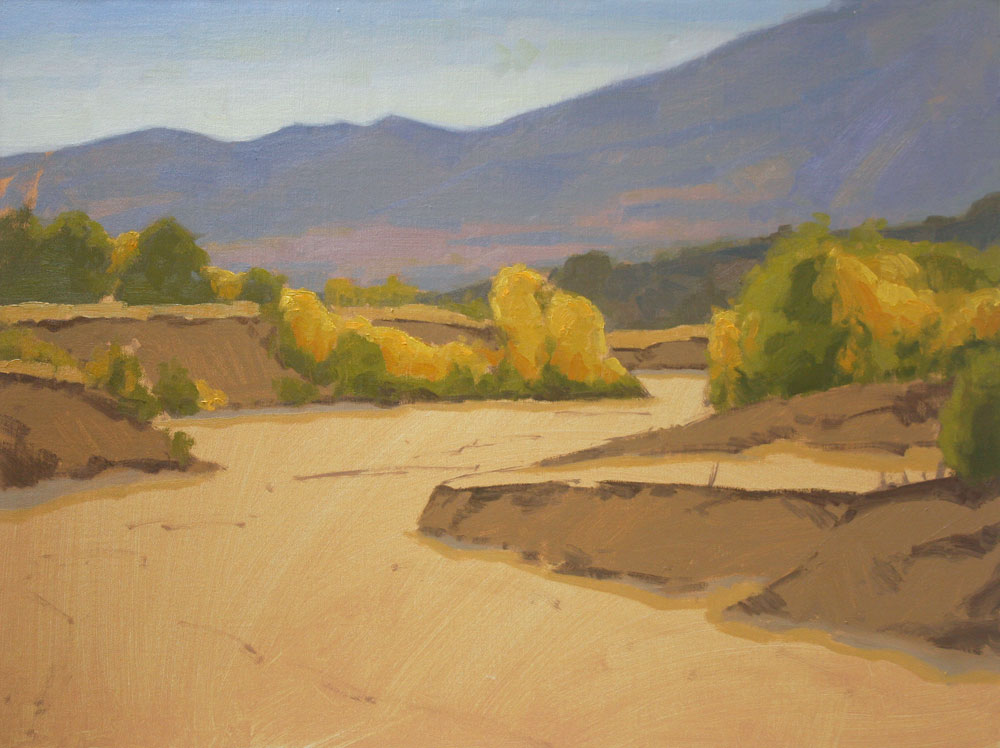
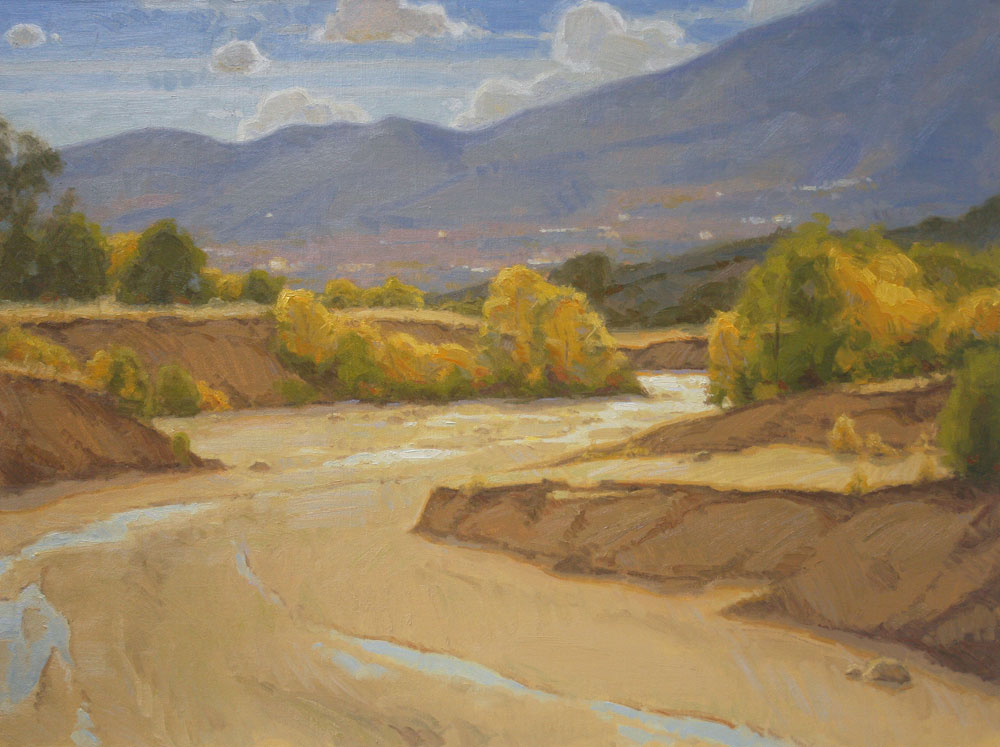
The last area to complete was the sky which I wanted to break up with a few clouds. There weren’t really any in my plein air piece, so I figured out a design that would work for that area. I also decided to give shapes to the clouds that would mirror the shapes of the trees below, which would help unify the background and the foreground. Then I looked over the whole painting to make sure every part was working well, and made adjustments where they were needed. In these last few steps, I repeatedly checked the painting’s reflection in a mirror. Seeing the image in reverse helps me find mistakes that I’ve missed. Often an edge that is too sharp or a distracting brush stroke needs to be softened.
Step 14: Varnish
All that I did for this last step was to sign the painting and varnish it. I can often get a better photo of the painting (with less glare) once it is dry and has been varnished.

4 Responses
emmylee
the steps are well detail for any one to use as guild thereafter, nice one
Dan Schultz
Glad you found it helpful!
Frances Morris
I enjoyed seeing your process. Would love to know how you manage to get your panel secured. I didn’t see any screws or fasteners…
Dan Schultz
The painting is held in place on my easel at the top and bottom of the panel. The knobs above and below can be loosened to adjust the holders upwards and downwards to wedge the panel in between if that makes sense. I guess it’s hard to tell in the photo.