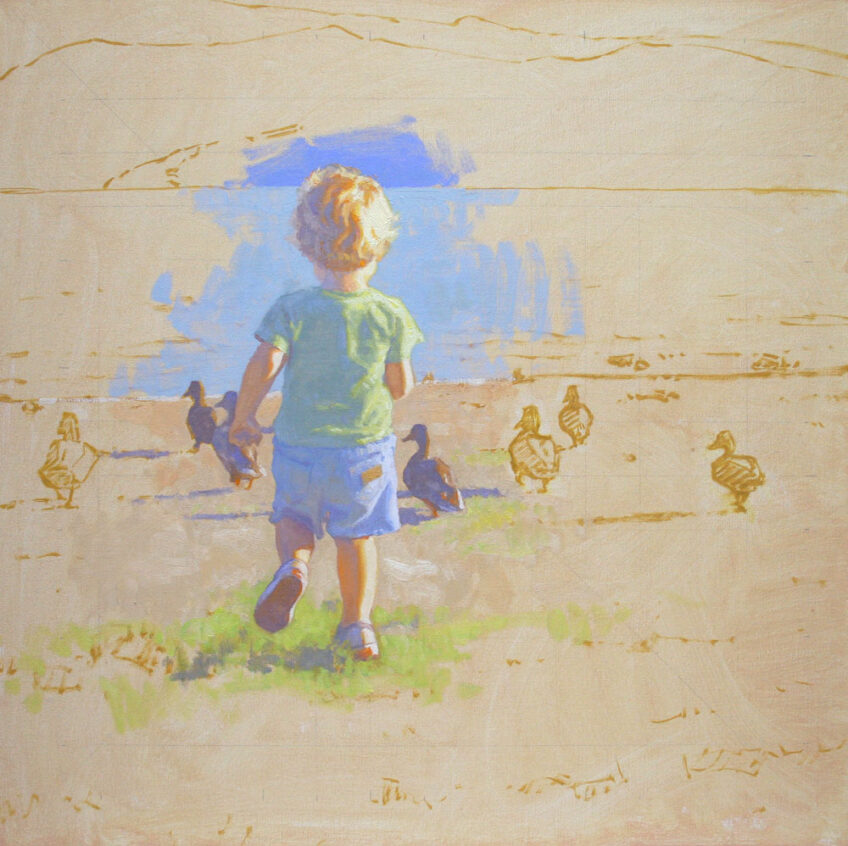
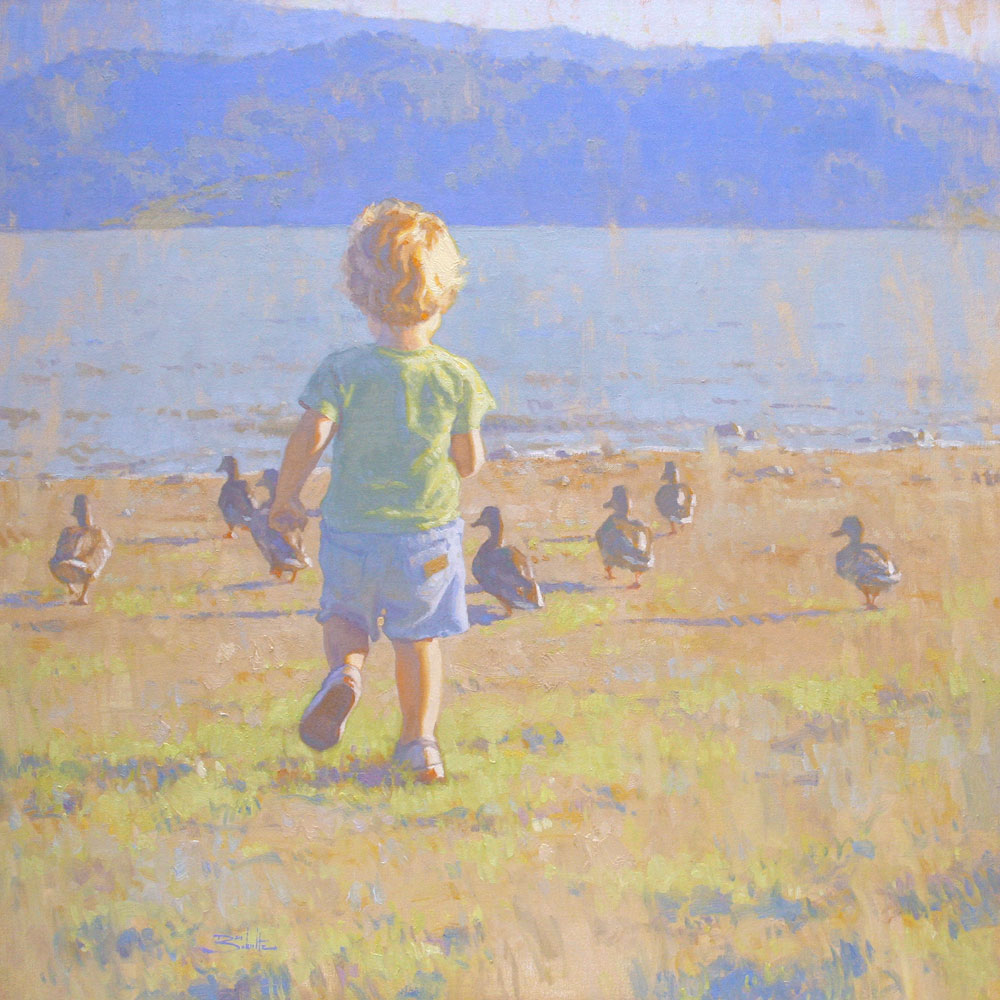
This step-by-step demonstration shows the process I often use when creating a medium-sized or larger figurative painting from a photo reference. It’s a method in which I start in one area (usually the center of interest) and work outward from there, finishing as I go. This demonstration also shows how painting a child is no different than painting an adult, a landscape or a still life. It’s all about correctly painting the shapes, no matter what the subject. Drawing accuracy has to be practiced and carefully checked throughout the process.
I chose to paint this scene in a higher key which allows me to explore subtle relationships of value and color temperature. I think it also gives the finished piece a bit of a nostalgic feel. Painting in a higher key simply means that all the dark and middle-range values in the painting are lightened, while all the colors become more saturated. All the values still have to relate to each other properly, but the range of values to work with becomes more narrow. The darkest darks in the painting become mid-tone values, while the lightest lights remain about the same value as usual.
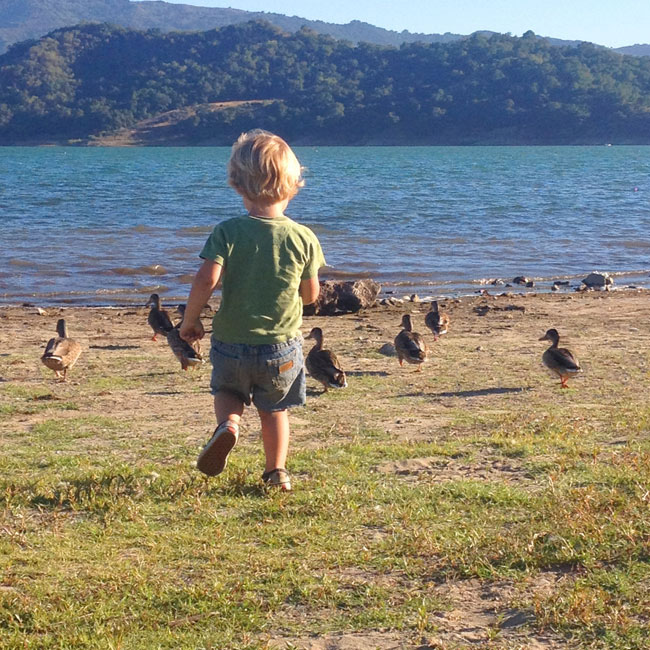
I made a few adjustments to the photo in Photoshop as I considered this image as a possible source. I thought a lot about the design and about how I would approach each area while painting. I adjusted the color and cropped the image into a square.
Preparation
For this 24″ x 24″ studio painting I used Claessens double-oil-primed linen canvas, #15 (my usual painting surface), mounted on a 3/16″ Gator Foam panel. (Click here for more information about how I make my linen canvas panels.)
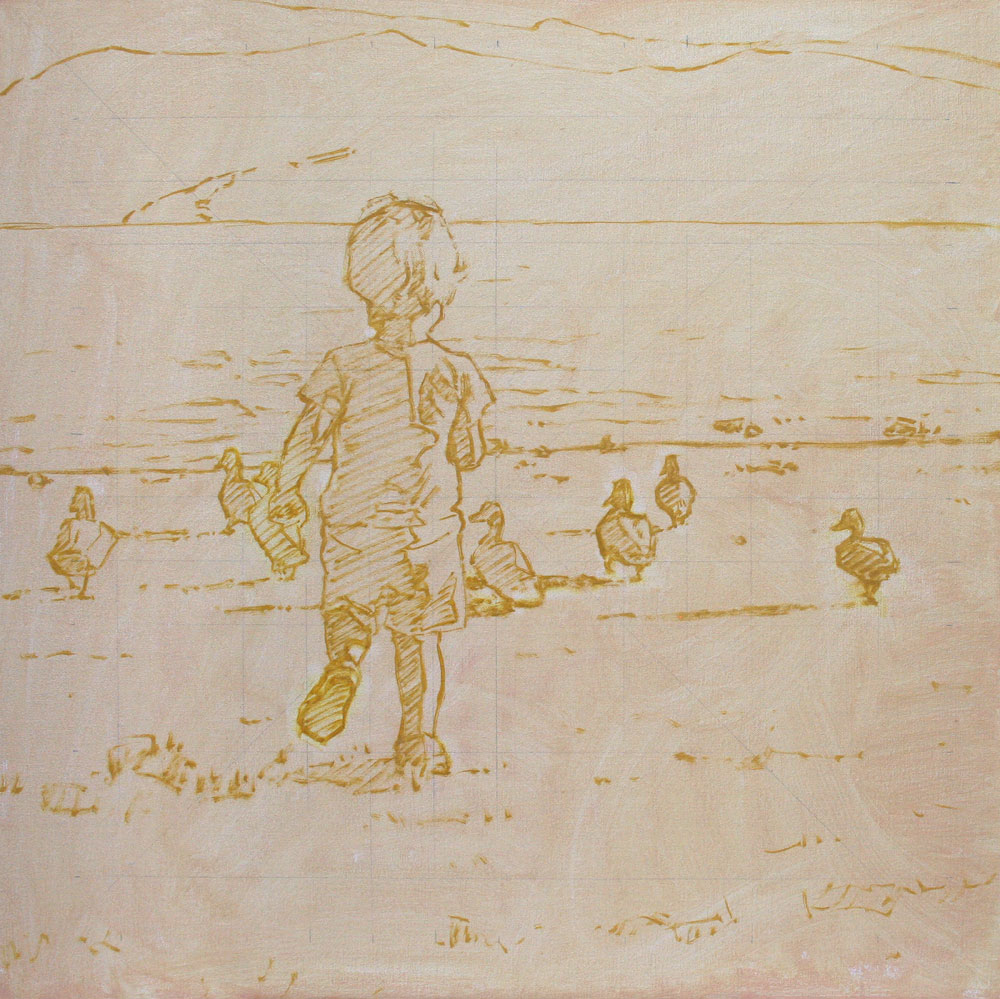
Using a graphite pencil and a ruler, I first drew a grid on the canvas to help me speed through the drawing phase of this painting. (You can see the grid lines on some of the photos below). I also placed a grid on my source photo in Photoshop.
I then applied an initial wash to the canvas with a color that I wanted to show through in various places in the finished painting. It’s based on the foreground sand color. I don’t use any medium with my paint, just mineral spirits (Gamsol made by Gamblin) that I sometimes use to thin the paint (which I did for the initial wash, then lightly wiped it with a paper towel).
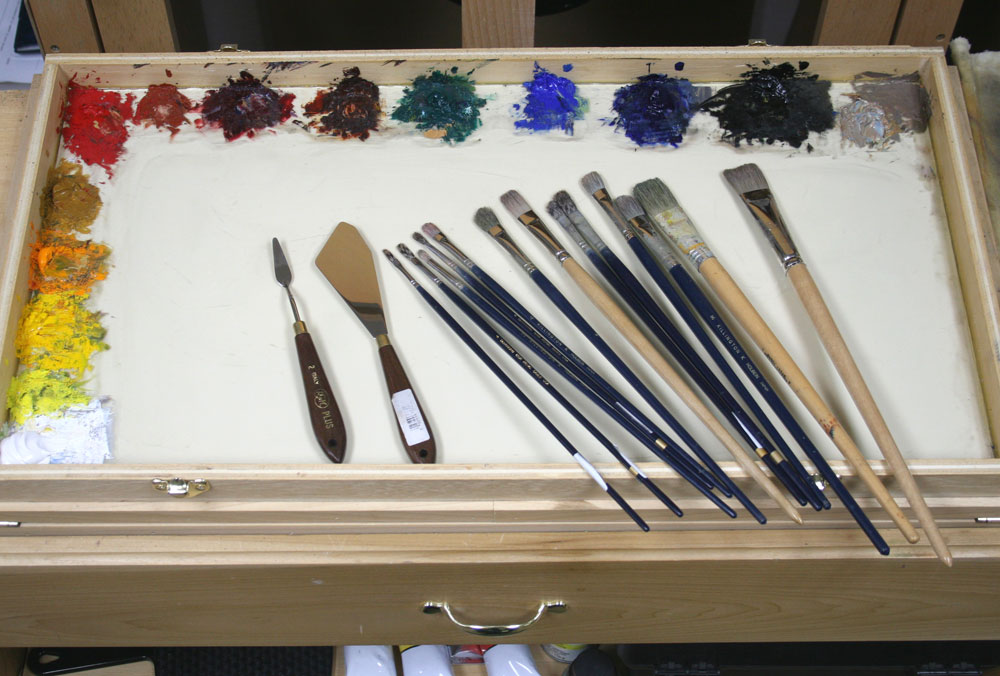
I used some thinned yellow ochre and a #2 flat bristle brush to draw out the scene on the canvas, being careful to check for accuracy. I also laid out all the rest of my palette colors (listed below).
Paint (oil):
(Starting from the bottom left on my palette and working upwards and to the right.)
• Titanium White (Winsor & Newton)
• Cadmium Lemon (Winsor & Newton)
• Cadmium Yellow (M. Graham & Co.)
• Cadmium Orange (M. Graham & Co.)
• Yellow Ochre (M. Graham & Co.)
• Cadmium Red (M. Graham & Co.)
• Venetian Red (Gamblin) (I haven’t been using this color much lately.)
• Permanent Alizarin Crimson (Gamblin)
• Transparent Red Iron Oxide (M. Graham & Co.)
• Viridian (M. Graham & Co.)
• Cobalt Blue (M. Graham & Co.)
• Ultramarine Blue (M. Graham & Co.)
• Ivory Black (M. Graham & Co.)
The last pile is a gray mixture made from the leftover paint on my palette from my last painting.
Brushes:
• Creative Mark Pro Stroke Series 77F hog bristle brushes, sizes 2 – 12
• Royal & Langnickel mongoose flats (series 5590), sizes 2 – 12 (these brushes have been discontinued, but a replacement is now being offered by Rosemary & Co.)
• Assorted palette knives for painting, mixing paint and palette cleaning
The Painting Process
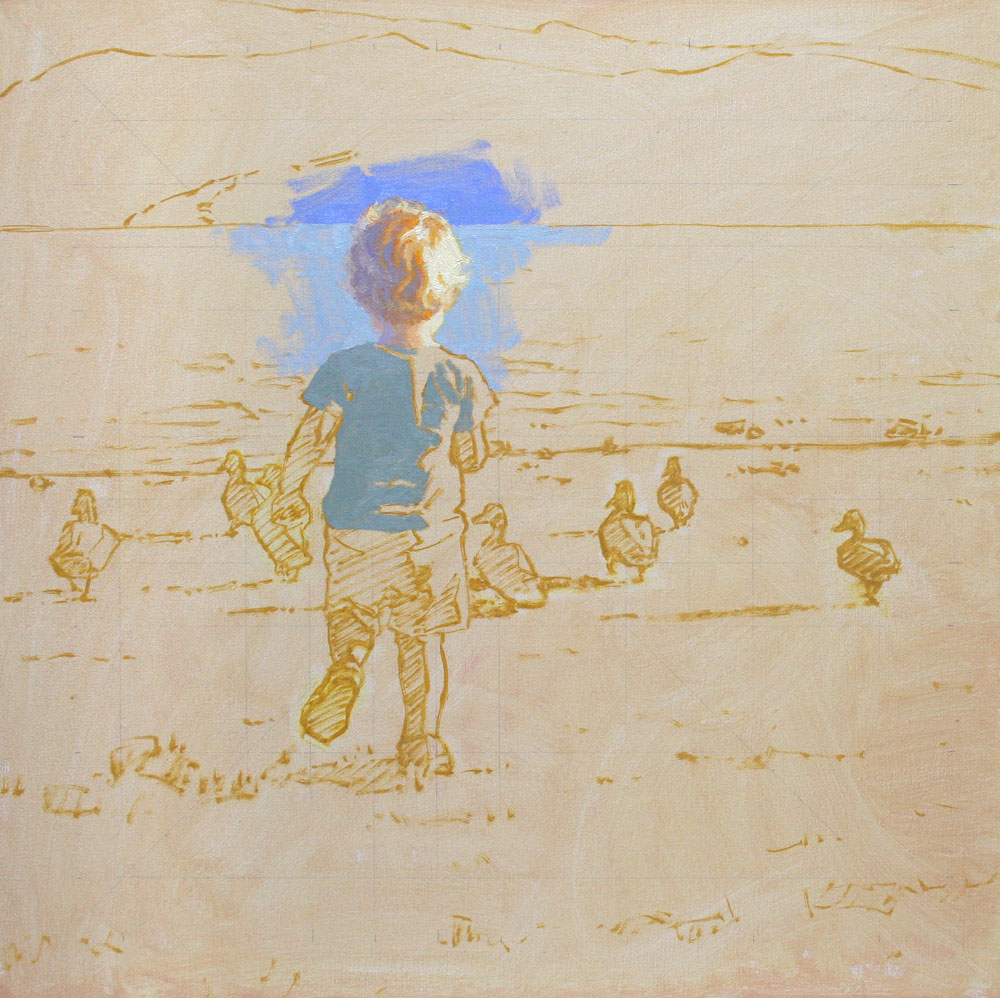
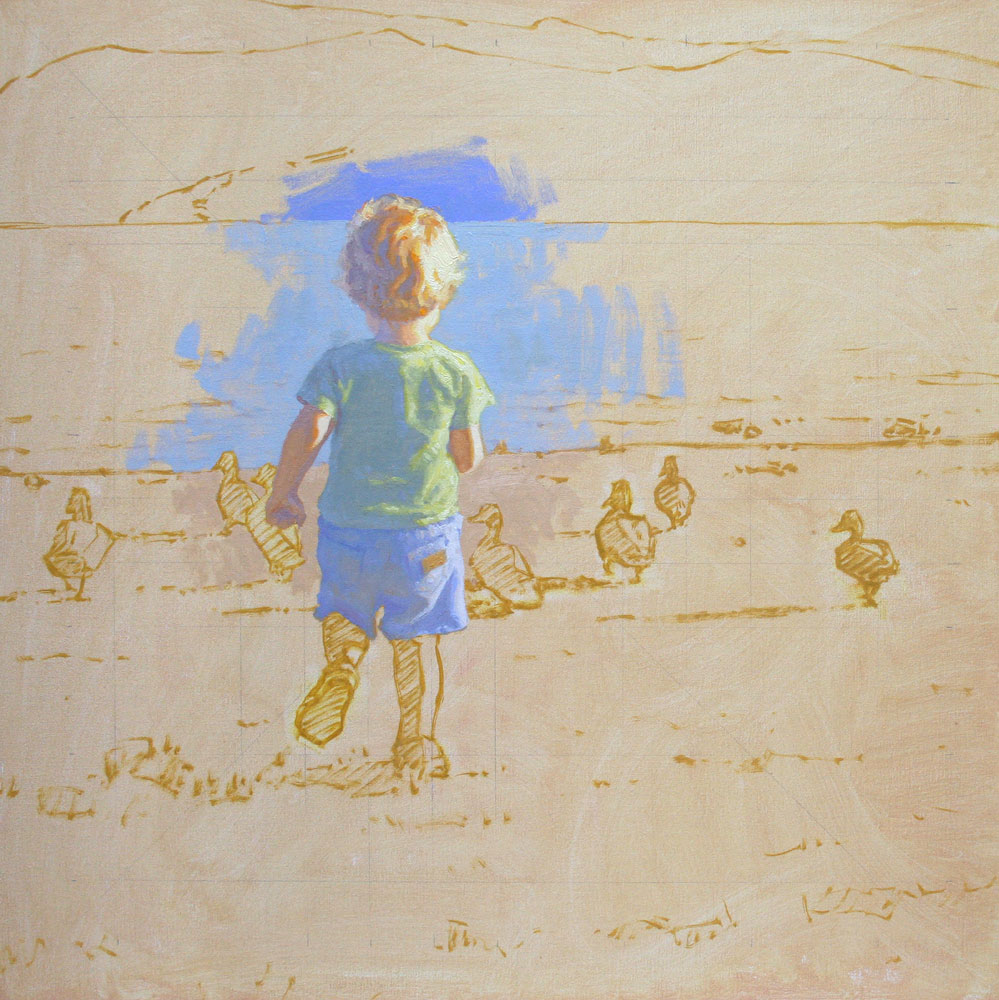
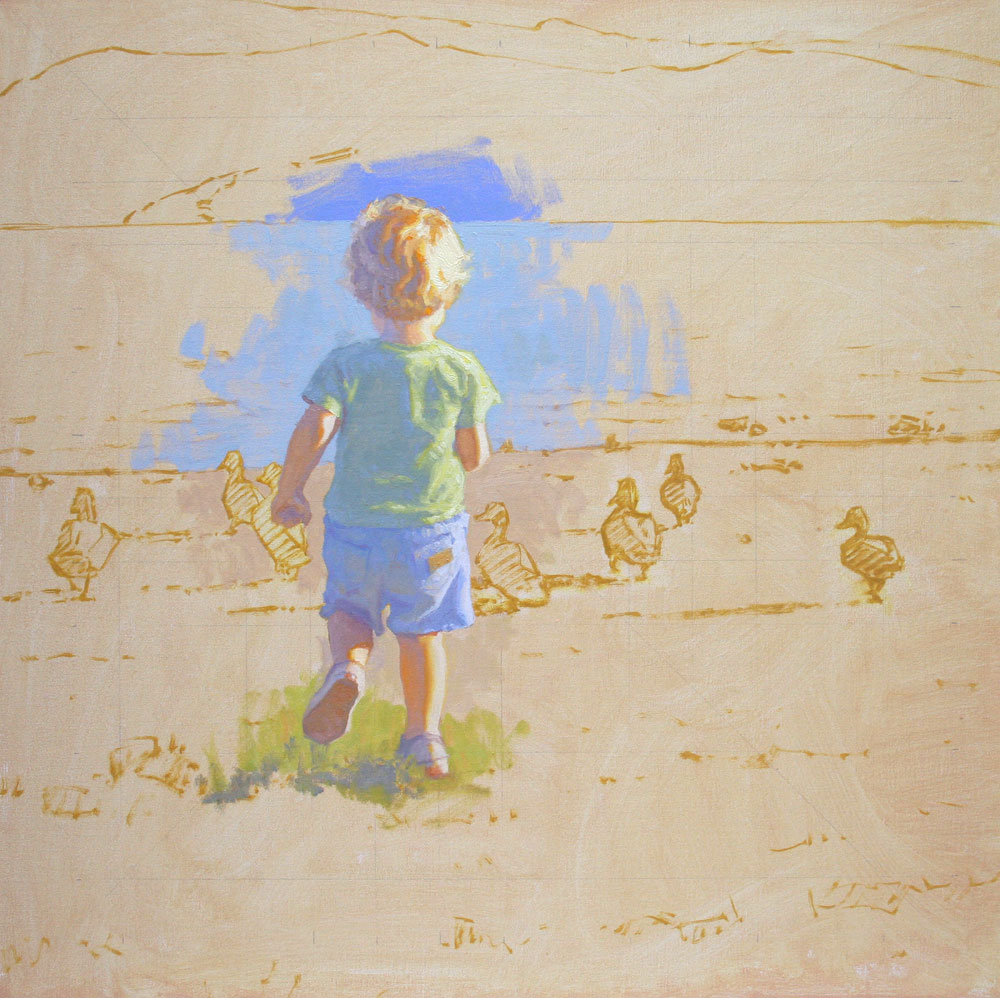
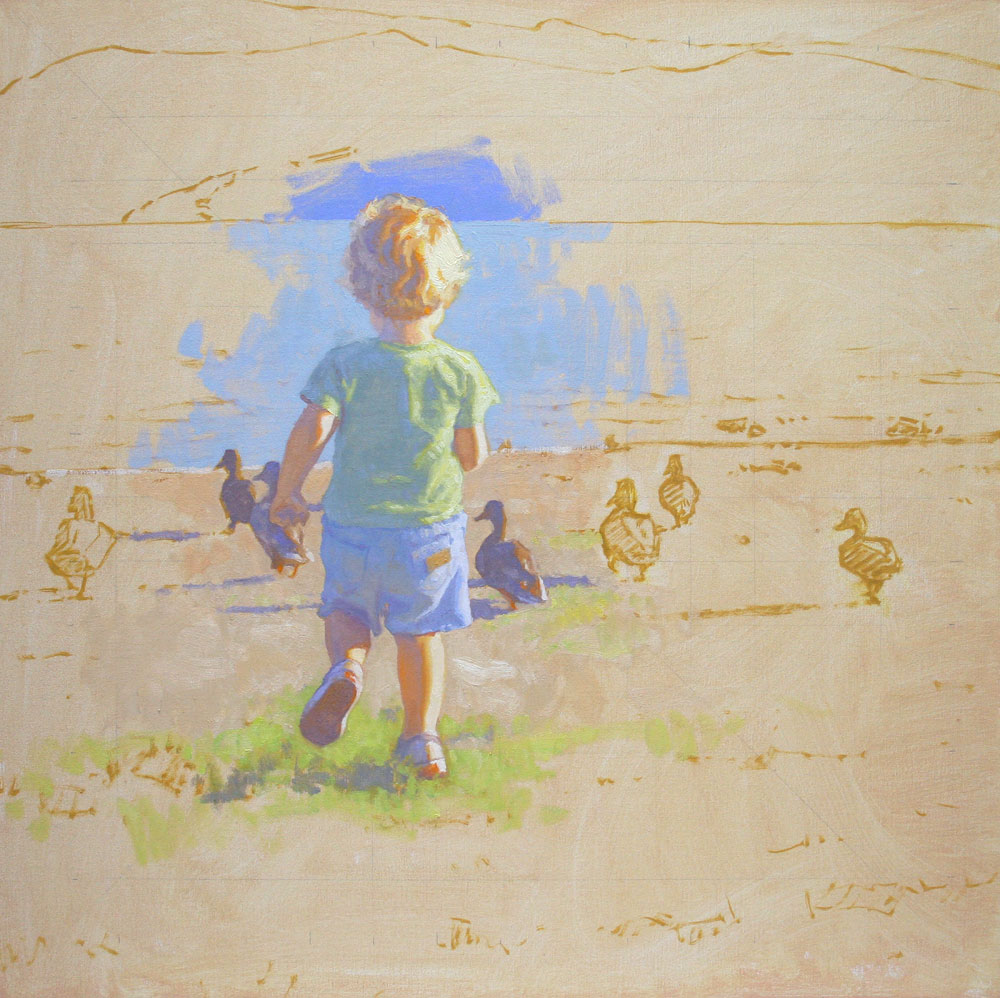
On larger figure paintings, I often start painting in a small area (usually the center of interest), and try to finish as I go along. That way if I need to leave the painting for a day or two, when I return I can simply pick up where I left off. This method keeps me from having to repaint areas that have dried and allows me to see fairly quickly how the most important area of the painting develops.
These first values and colors laid down are critical because all the comparisons through the rest of the process will be based on this early stage. Therefore, I do my best to accurately compare each value and color. I also try to monitor my drawing accuracy so that I don’t accidentally change the shapes from my original drawing as I add paint.
Note that as I paint, I continue from one shape to its neighboring shapes. When shapes are touching, they are easier to compare accurately. Once the values and colors are established, I paint the consecutive shapes (comparing as I go) until I have finished the painting. I also try to consciously think about where I want the background wash color to show through.


5 Responses
Sofia
Beautiful! I love the theme and the brightness of the painting. I feel the sunshine.
Dan Schultz
Thank you!
Rhonda
This is lovely and love your break down. Very helpful
Gary Bradey
love the processIm getting ready to start a 36 x 36 and this is a big help (starting at center and stopping when needed)
Dan Schultz
Glad you found it helpful, Gary. Hope you’re doing well!