Follow along through this step-by-step oil painting demonstration of The Old Road. I completed this piece in my studio using a couple of photo references I took near Mono Lake, California. As you will see, this one required a bit of work in Photoshop to complete the scene before I started painting.
Image Preparation
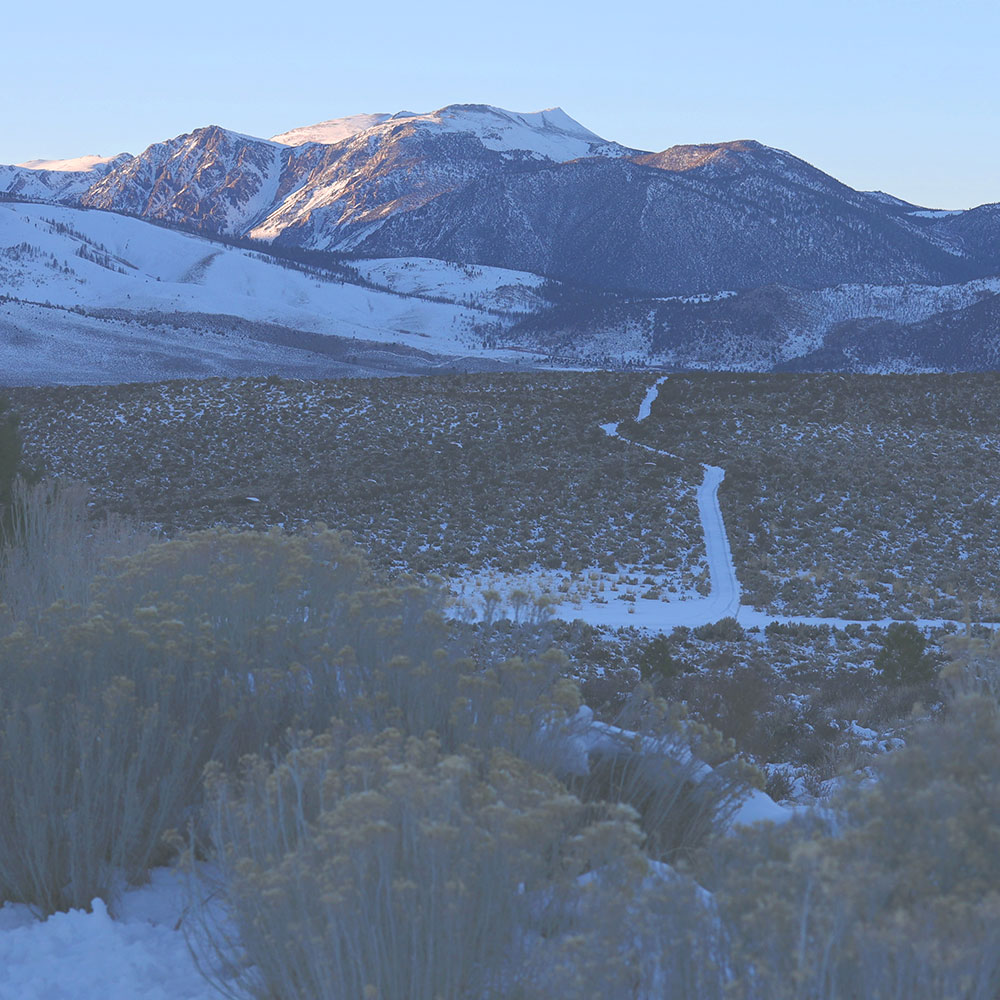
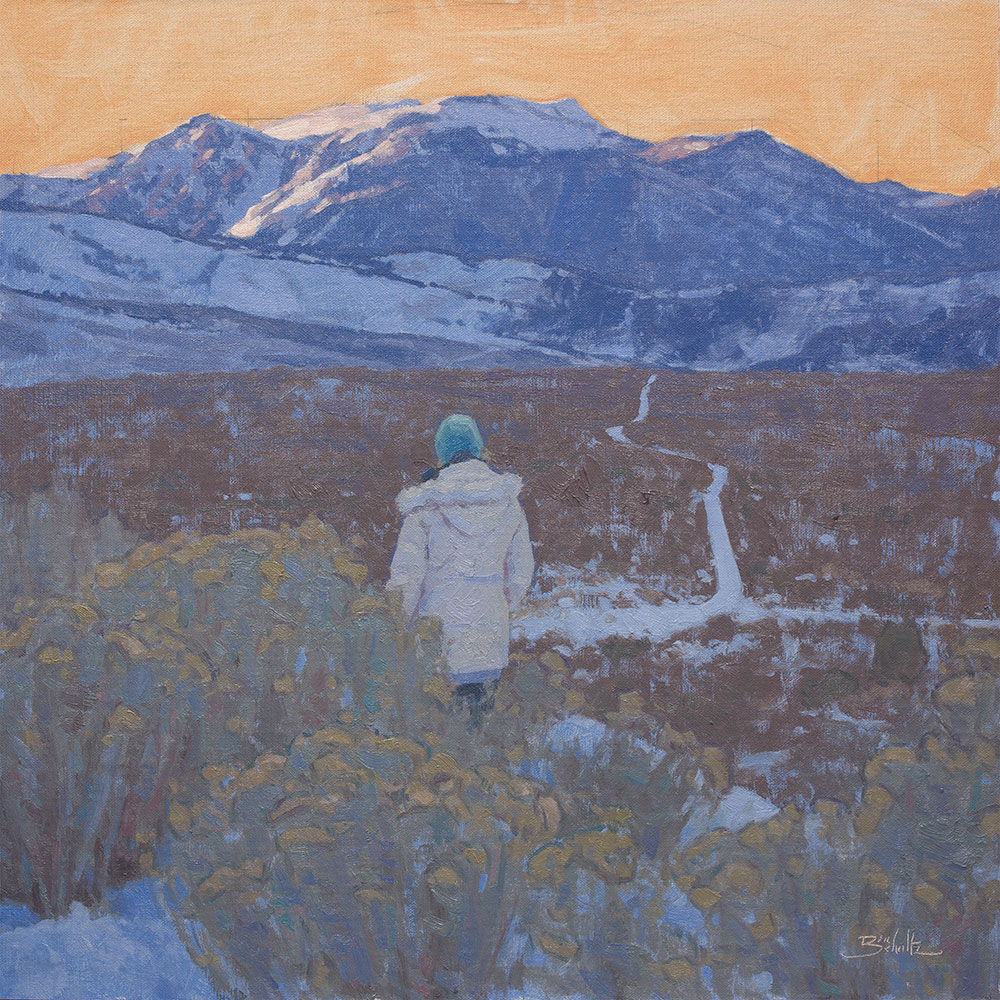
While looking through all the photos I took in the area, the design of this landscape stood out to me. I liked the little snowy road leading back toward the light on the mountains. And I liked the fact that the colors are almost all in a close-value range. It seemed to create an interesting mood.
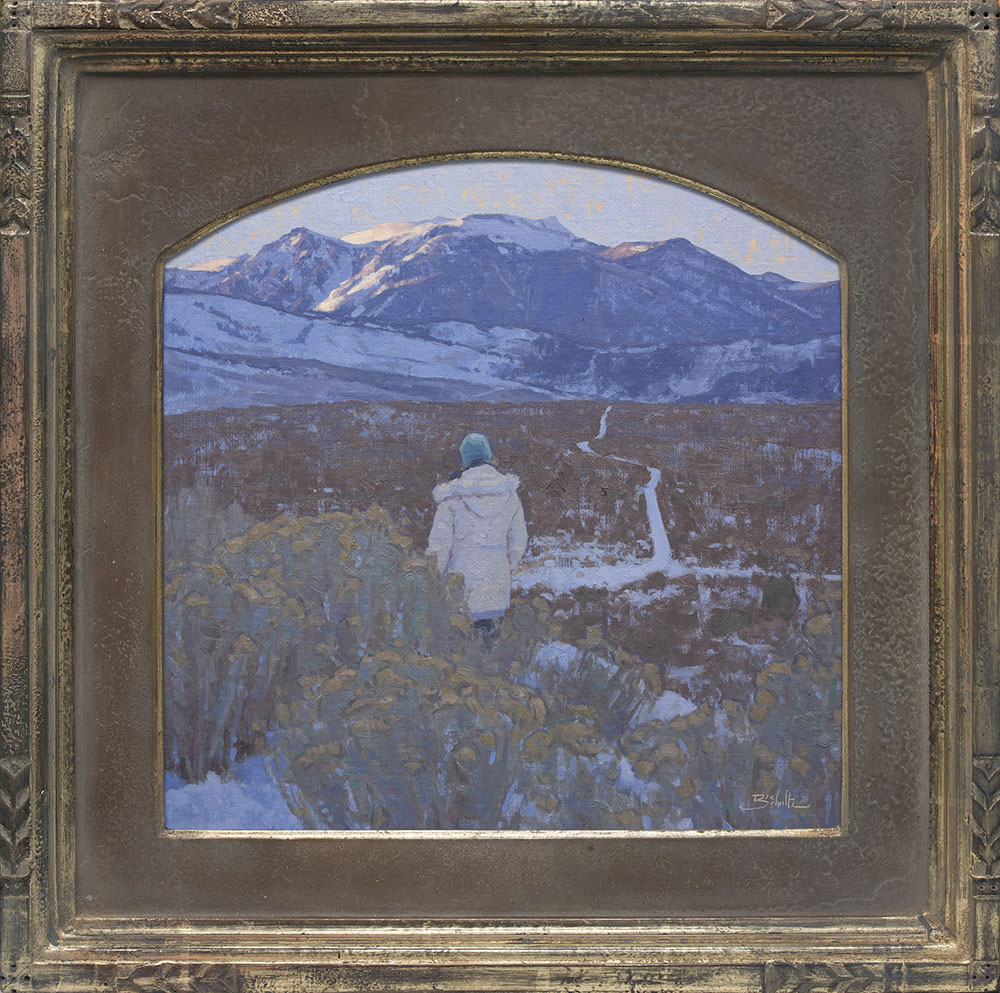
I made a few color adjustments to the photo in Photoshop and cropped the image into a square. A few months earlier I had purchased a beautiful square frame with an arch at the top. The frame would fit an 18″ x 18″ painting and I had been saving it for a painting of a particular color scheme. I thought this might be it.
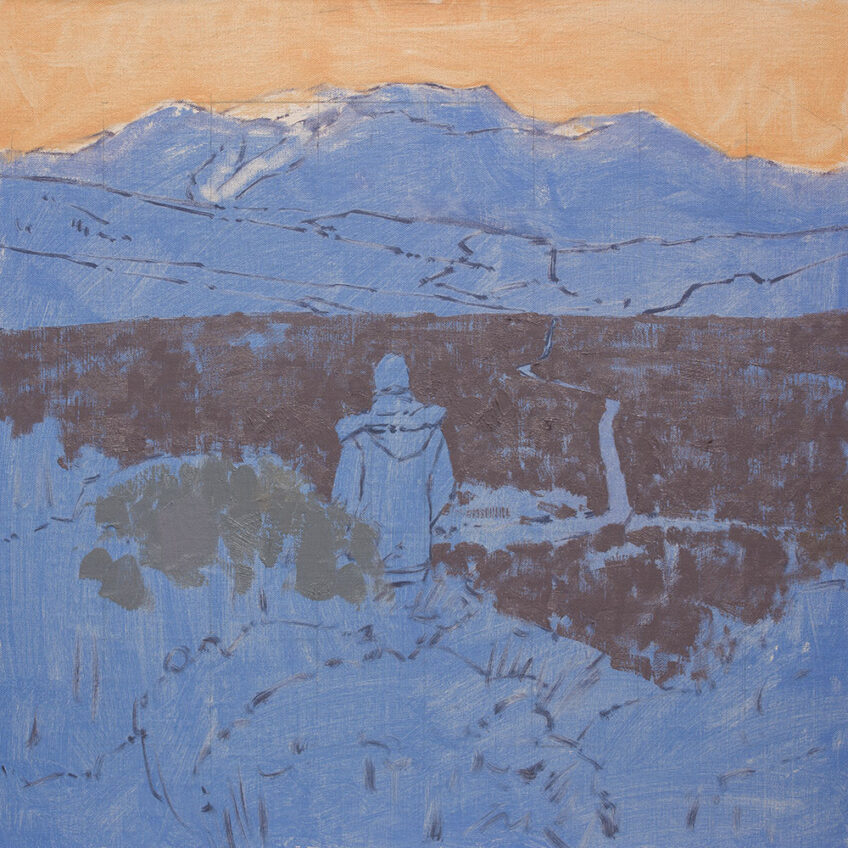
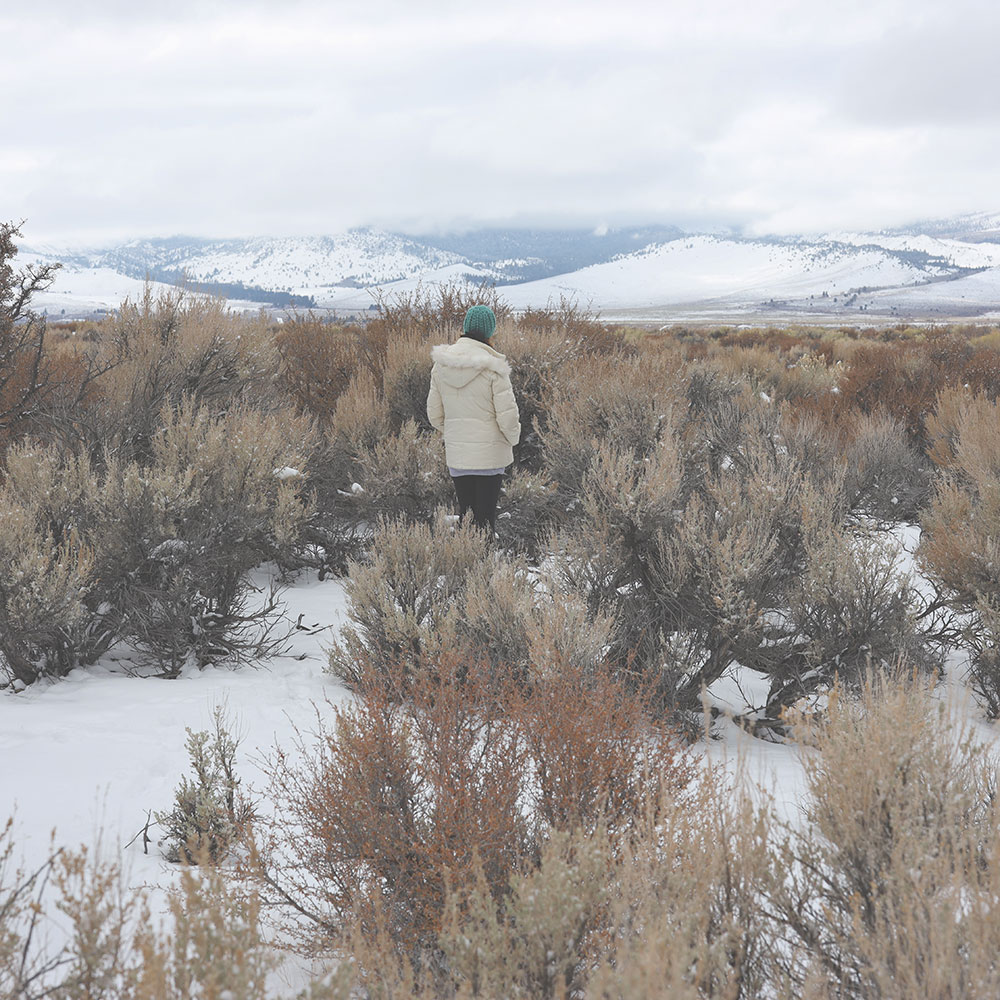
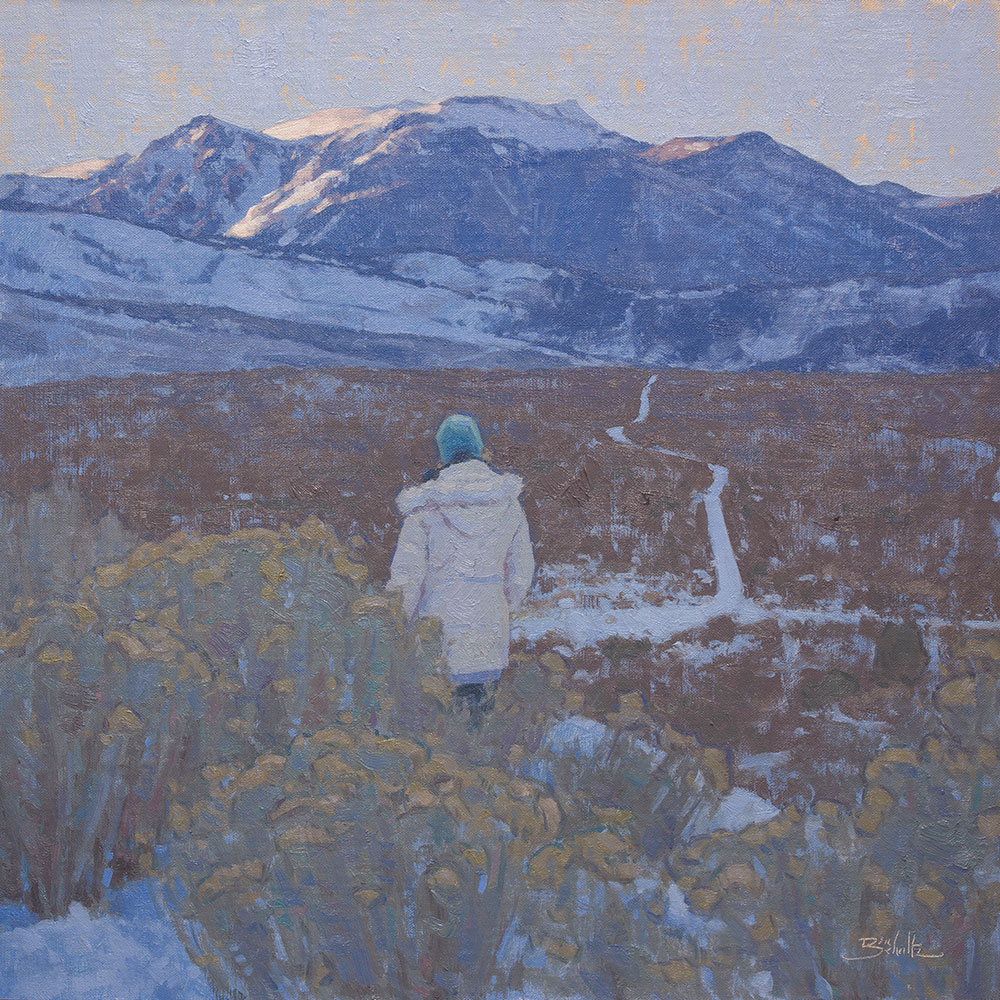
As I worked on preparing to paint this scene, I wondered if the addition of a figure would bring even more impact to the design. I had taken some photos of my wife out in the snow during this same trip. So I chose one of the photos of her in a position I liked and added her to the landscape scene in Photoshop.
I had to flip her horizontally (I don’t think she minded) to fit the scene and also had to adjust her colors to match the coloring of the landscape photo. The combined image is below. I think her addition to the scene adds a sense of increased depth to the image. The viewer is now more encouraged to follow her gaze out toward the road and the mountains beyond.

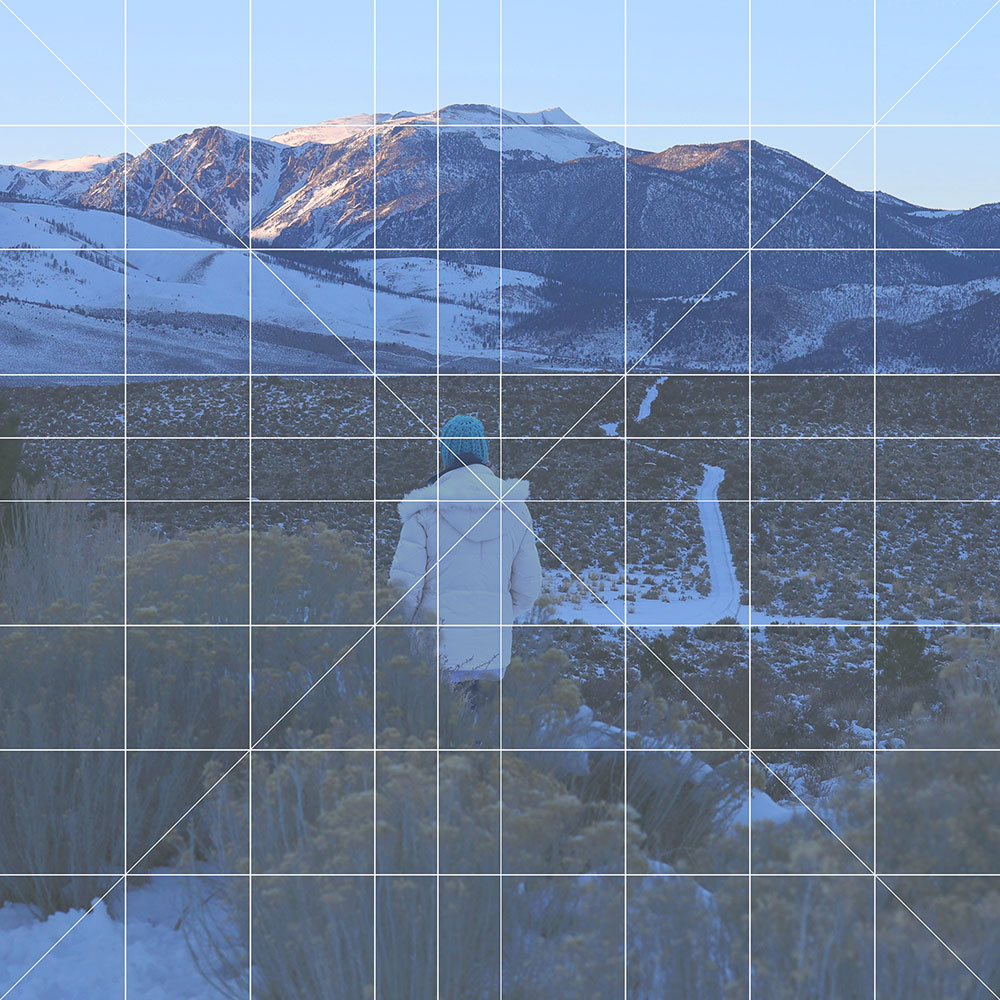
One final step took place before I started painting. I created a grid in Photoshop to lay over the image to speed things up once I started drawing on my canvas. See my post about how to make a Photoshop grid if you’re interested in learning how to make one yourself to use with your images.
Supplies
Finally it’s almost time to start painting! I prepared an 18″ x 18″ canvas panel using Claessens #15 double-oil-primed linen canvas (I prefer linen canvas instead of cotton), mounted on a 3/16″ Gator Foam panel. Learn why I recommend canvas panels instead of stretched canvas and how to make your own canvas panels.
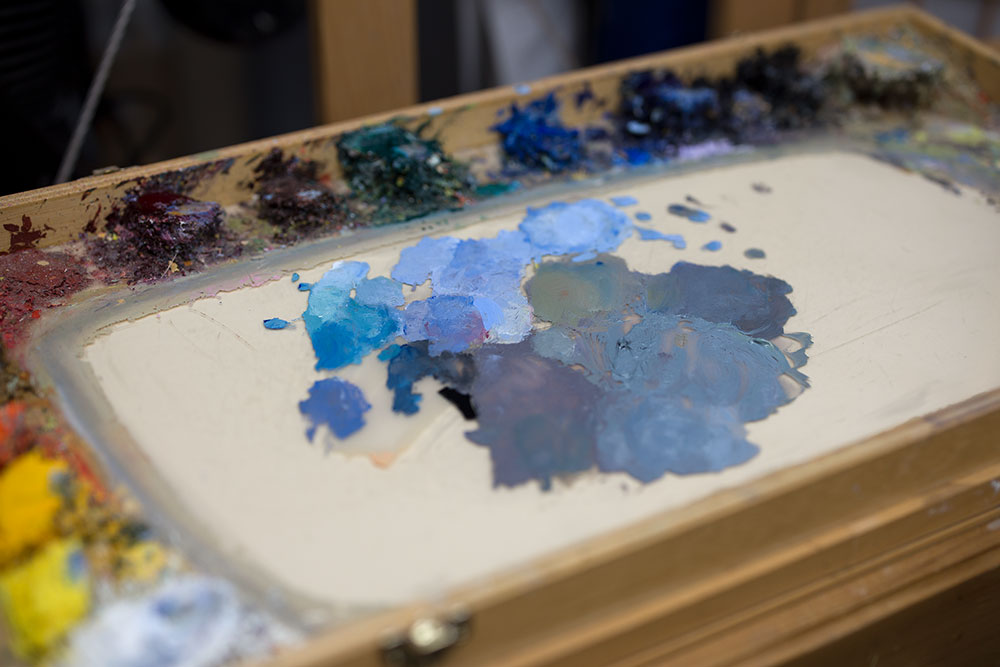
I laid out my palette of colors, making sure to squeeze out plenty of paint. All the colors I used for this painting are M. Graham & Co. oils. I’ve been recommending M. Graham paint for years and they recently made me one of their artist ambassadors. One of the most important reasons I use and recommend their oil paint is its resistance to yellowing over time.
M. Graham & Co. Oil Colors:
- Titanium White
- Bismuth Yellow
- Cadmium Orange
- Yellow Ochre
- Anthraquinone Red (Permanent Alizarin Crimson)
- Viridian
- Ultramarine Blue
- Dioxazine Purple
- Ivory Black
Brushes:
Solvent:
- Gamsol odorless mineral spirits, made by Gamblin
Painting Process
Step 1:
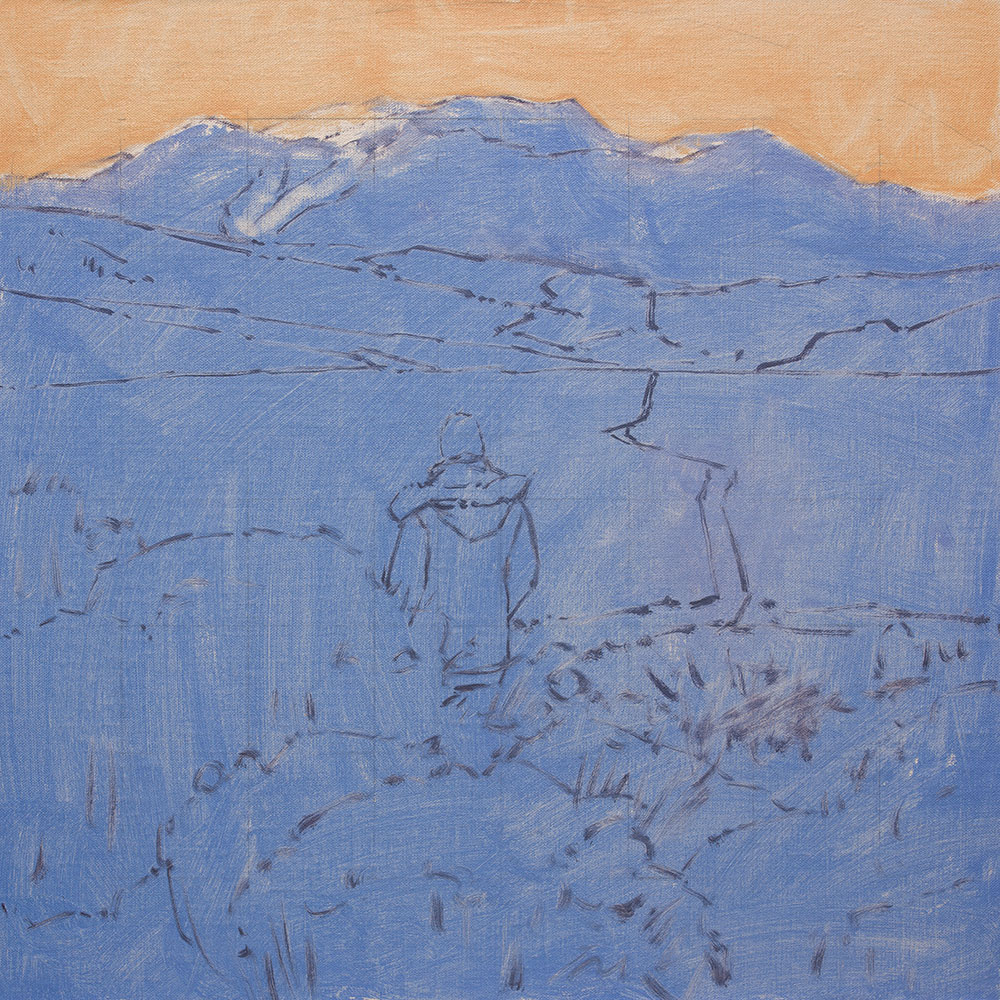
Using an HB graphite pencil and a ruler, I drew grid lines on my canvas to match the grid lines I had placed on my source photo. I also included a curved line at the top of the canvas to indicate where the arch from my frame would line up on the finished painting. (You can faintly see the graphite lines in the image below — they tend to get washed off to an extent when applying the initial paint washes.)
I chose two separate colors for my underlying washes. And I tried to be as accurate as possible with the wash colors and values since the plan was for them to show through in the finished painting.
Because of all the underlying snow throughout the majority of the scene, I decided that a blue/violet wash would be helpful showing through the other colors I would paint on top of it. This color was mixed using Titanium White, Ultramarine Blue and a little Anthraquinone Red.
I wanted to add some warmth of color to the sky area so I chose a warmer wash there. It was mixed using Titanium White, Cadmium Orange and a little Yellow Ochre.
I made the wash mixtures quite runny using Gamsol, then brushed the colors liberally throughout the appropriate areas using a #8 hog bristle brush. The excess wetness was then lightly wiped away using a paper towel.
Next, I drew out the shapes of the scene using a #2 hog bristle brush and a mixture of Titanium White, Ultramarine Blue, Anthraquinone Red and Yellow Ochre (basically making a darkish gray). Again, this mixture was made quite runny with Gamsol so that the color would easily flow off the brush. I paid close attention to my grid lines and tried to keep my drawing precise and accurate. Using a paper towel, I wiped away my wash in a few areas where the sunlit shapes would be painted on the mountains.
Step 2:
As you may know from my other demonstrations, I sometimes prefer to start in one area of a painting and work outwards, finishing as I go along. That way I can work wet-into-wet and not have to worry about areas drying that aren’t yet finished. This painting was sort of handled the same way, although I was pretty sure I could finish a painting this size in a few days before the paint would have a chance to dry.
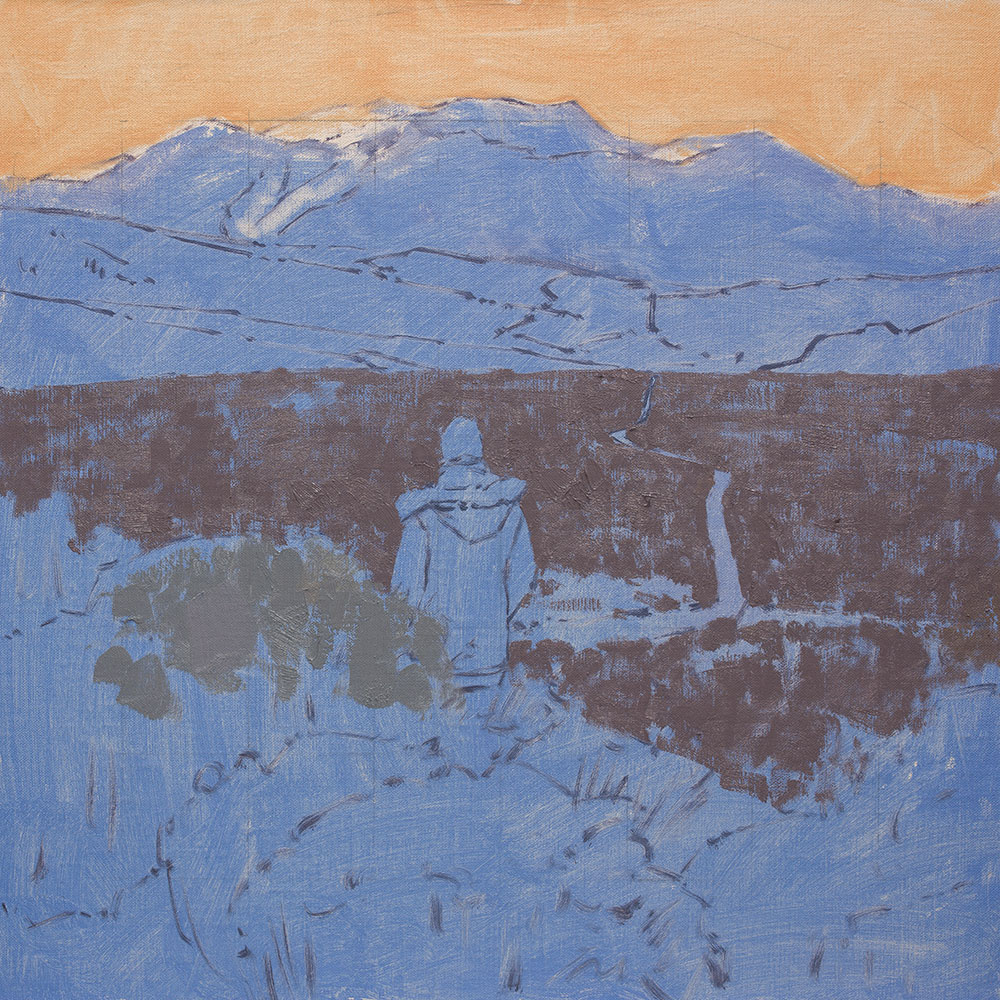
The middle ground of this painting seemed like a good place to start since it was a large, fairly simple area. I used my soft 1/2″ Legion Long Grainer brush loaded with plenty of paint. The color is a mixture of Titanium White, Anthraquinone Red, Yellow Ochre and Ultramarine Blue.
I was careful to apply the paint deliberately with each stroke so as to make sure some of my underlying wash could be left showing through. In this way I hoped to achieve the look of the snow peeking through the distant bushes without having to actually paint the little bits of snow peeking through. Time saver! And not only that, it should also help maintain a simpler, stronger statement in the fished painting.
Once I had the middle ground shape covered, I started on the foreground bushes. The color is made from the same combination of colors as the middle ground, just different proportions of each color. I always try to move from one shape to an adjacent shape so I can compare the two together in value and color. When shapes are touching, they are easier to compare accurately.
It’s worth noting that I try to control my paint mixtures on the palette by mixing each color right next to my other mixtures. This way I can compare how each mixture on my palette relates to each other. It’s a preview of how the colors will relate once they are applied to the canvas.
Step 3:
I continued filling in the foreground bushes, pushing the color darker toward the base of the bushes (using Ivory Black, Ultramarine Blue, Anthraquinone Red, Viridian, or a combination of these) and more toward Yellow Ochre for the flowery areas. It was also time to start on the figure. I tried to carefully compare how the colors related to what I had laid down so far. A lot of squinting is helpful during these initial block-in stages to make sure I’m accurately controlling the values of my colors.
For Sarah’s coat I mixed Titanium White with small amounts of the same colors I’d been using so far: Yellow Ochre, Ultramarine Blue and Anthraquinone Red. Her hat is Titanium White, Viridian and Ultramarine Blue with a small amount of Bismuth Yellow in the lightest area. In her scarf and pants, I used Ivory Black mixed with a little Ultramarine Blue and a small amount of Anthraquinone Red, Yellow Ochre and Titanium White. I used my soft 1/4″ Legion Long Grainer brush for much of the detail work. And I tried to keep the edges around Sarah sharp and crisp to call attention to her.

Step 4:
I spent a good deal more time refining the foreground bushes. Various color notes were added using the same colors as I’ve listed already, with the addition of Dioxazine Purple in some areas. Some outlining around the shapes also gave them some definition. I added detail to the foreground snow as well as the middle ground snow on and around the distant road.
Step 5:
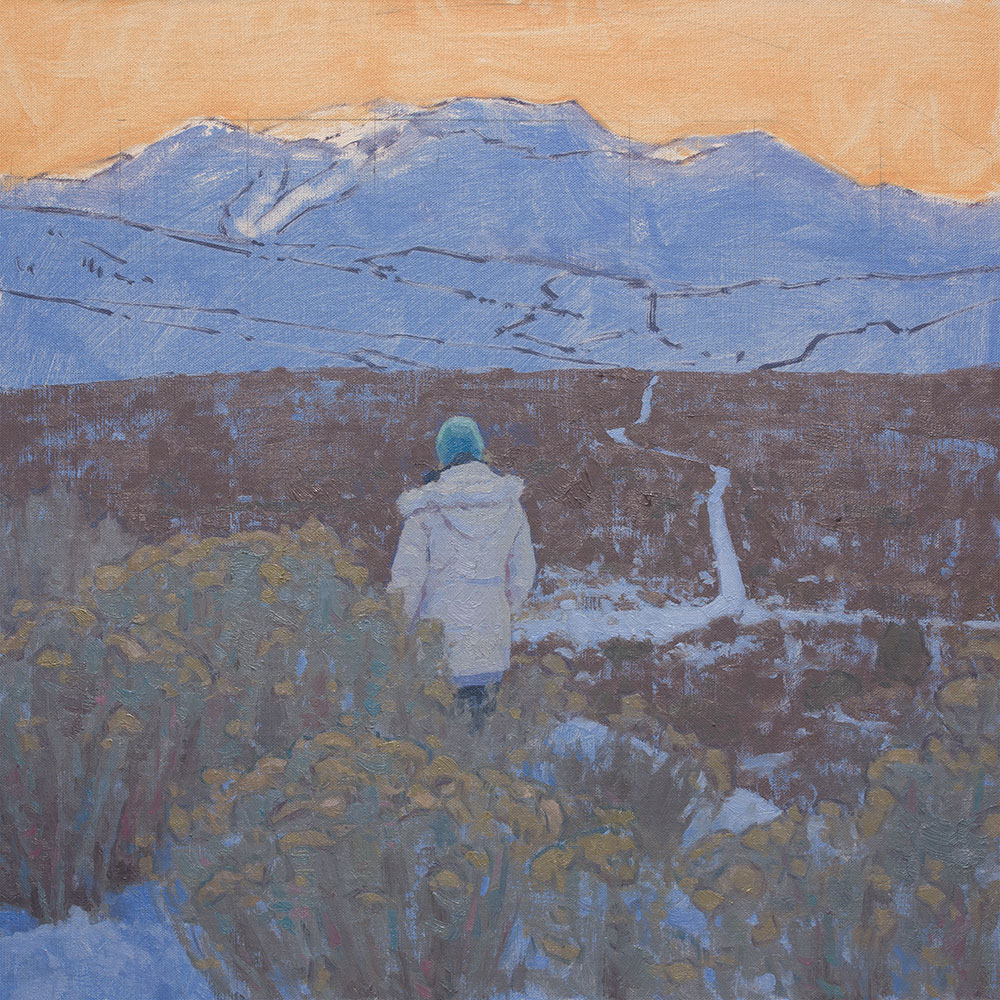
Mountain time! By now I had realized that my blue/violet wash color had worked out well where it was peeking through the colors I had painted in the middle ground and foreground. My hope was that I could use it in the same way in the mountain shapes. So I mixed a color for the darker areas of the mountains using Titanium White, Ultramarine Blue and a little Anthraquinone Red with a small touch of Yellow Ochre. I once again applied it with my soft 1/2″ Legion Long Grainer brush while being careful to let the undertone wash show through for the lighter snowy areas.
I remixed my initial wash color so I could add it in detail marks where necessary. And I began to add the sunlit areas using a mixture of Titanium White, a little Yellow Ochre and a little Anthraquinone Red. There are also a few places in the mountains that called for a warmer pink color where the sunlight is hitting the distant trees. This mixture was made with the same colors but with the Anthraquinone Red predominating.
You may also notice that I added some purple marks in the distant middle ground. Once I had painted the mountains, the middle ground seemed to need some purples to help the two areas relate better to each other. This color was made with Dioxazine Purple added to my previous mixture of Titanium White, Yellow Ochre, Anthraquinone Red and Ultramarine Blue. I was careful to make sure it was the same value as the rest of the middle-ground.
I also decided to go ahead and sign the painting while the foreground was still wet. I’ve been liking the ease of scratching my signature into the wet paint instead of painting it on later.
Step 6:
The sky was quite simple to paint. I used a mixture of Titanium White, Ultramarine Blue and a tiny addition of Bismuth Yellow. And I was careful to allow some of my warm wash to show through between my strokes. Thankfully the value I chose for the warm wash in the sky ended up matching the color I painted on top so neither one is lighter or darker — just different temperatures of color. This creates an impressionistic effect to match the broken color quality in the rest of the painting.
I did a little more tweaking here and there where I felt like it was needed — small detail touches mostly. Then I let the painting dry. I always keep an eye on paintings as they dry while some time passes. Sometimes things will jump out at me that need adjustment, but in this case I didn’t need to go back in to make any changes. Always nice when that happens!
Once the painting was dry I applied a coat of Gamvar Matte varnish. I’ve been liking a matte finish on my paintings as I think it makes them easiest to see no matter where they are eventually hung. A glossy varnish makes the surface of a painting quite reflective, meaning that lights shining on the painting can create a lot of glare. Matte varnish has very little reflectivity, meaning almost no glare. Learn why varnish is important.
Leave a comment below and let me know if you have any questions about my process. I appreciate you following along through my demonstration of The Old Road!
21 Responses
Sheppard Bear
Fantastic! Always informative and helpful.
Barbara G Furry
Beautiful painting! Thank you for sharing your process!
Debra Heard
Beautiful painting! Love seeing the process of paintings. Thank you for sharing!
Aleta Andrews
Subdued yet vibrant, gorgeous. Thank you for sharing your knowledge and expertise!
Marie-Therese Brown
will you varnish this painting?
Dan Schultz
I neglected to mention in the article that I did apply a coat of Gamvar Matte varnish. (I like the matte look rather than a glossy finish these days.) See the following link for my previous blog post about Gamvar. https://www.danschultzfineart.com/three-reasons-to-varnish-oil-paintings/
Kay Zetlmaier
Than
Thank you Dan.this is very helpful and absolutely gorgeous!
Gary Hovland
Love it – thanks for sharing!
Shelley Breton
So great to read and see your progress through this one. Beautiful! Thank you!
Lynn Davis-Smith
Thank you for this thoughtful and detailed demo of this gorgeous piece, Dan. I am curious to know what brushes you have decided to substitute for the Royal & Langnickel mongoose flats that are no longer available.
Dan Schultz
Thanks, Lynn. I’m liking and recommending Rosemary & Co. “Masters Touch” Long Flats, Series 279, available at the following link: http://www.rosemaryandco.com/masters-choice-long-flats
Dan Schultz
Thanks so much for the nice comments everyone! 🙂
Gayle Martin
Thank you for sharing this, Dan. It was educational to read your process. You truly captured the mood.
Stephanie Merchant
You always make it look so easy! Beautiful job! I really like the focus on Sarah. Thanks for sharing.
Stefan
Hey Dan,
nice demonstration and great painting conveying an amazing atmosphere.
-Stef
Michael Craig
Hi Dan,
Absolutely love this painting and this lesson is one of your best. You’re a gifted teacher, even when you’re only using your keyboard. I still use many of your processes from the class and workshop in Colorado Springs. Thanks so much for sharing your expertise and experience.
Mike
Lisa David
Your post is so detailed and informative! Thanks for being so generous in sharing your process. It’s a phenomenal painting-you made many wise decisions along the way! Well done!
Darryl Yee
Hello Dan-
Have you ever tried the Walnut Alkyd Medium? I’m sure it will speed up drying time if nothing else. But I would like to know if you have experimented with it before I give it a go. Look forward to your comments. Thank you.
Dan Schultz
No I haven’t messed around much with the walnut/alkyd medium. I usually want my paint to stay wet longer so I can continue adjusting shapes and edges, so I haven’t experimented much with things that speed up drying time. Good luck if you give it a try!
Frances Morris
Lovely painting and so interesting to see your process! Do you often paint different color washes before you do anything else – and how do you decide what color(s) to choose for the underpainting?
Dan Schultz
Hi Frances, I don’t always do color washes before I paint. But underpainting provides a lot of possibilities. This article will give you some more info about it: https://www.danschultzfineart.com/benefits-of-underpainting/